Choosing Our Theme
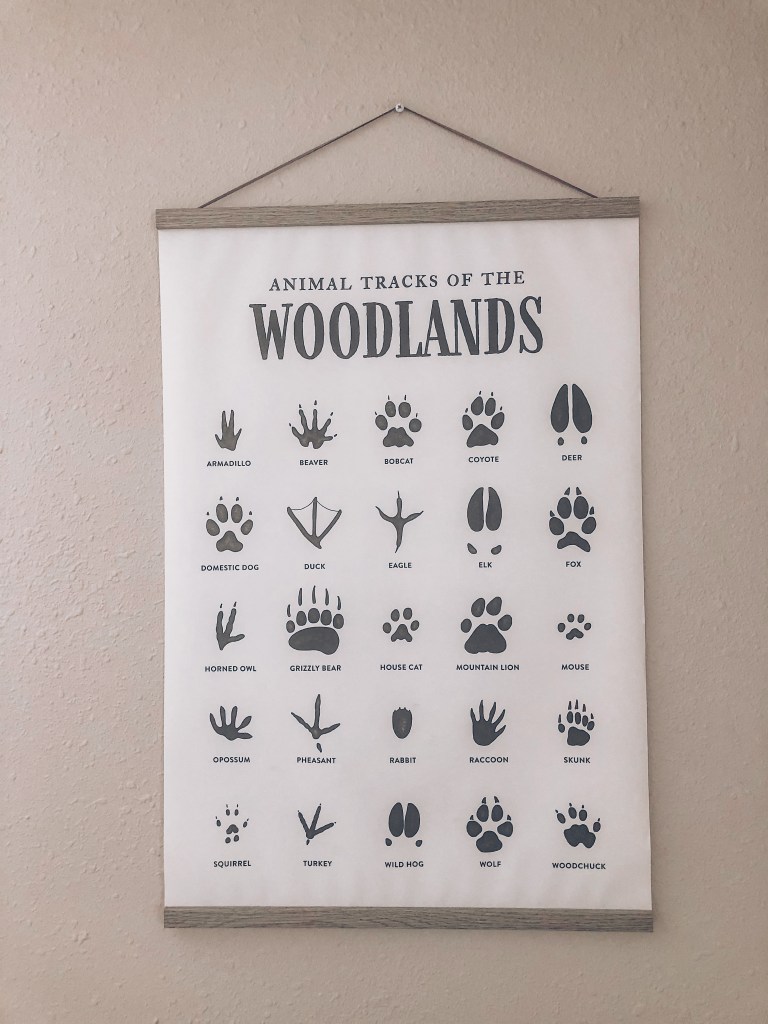
At 16 weeks pregnant, we found out that we were having a boy. We were so excited, but I had no clue what direction to go for things like names and nursery theme. I was sure I was having a girl! So, right away I started to look for nursery theme inspiration online and in some of my favorite decor stores. To include my husband in the decision, I took him with me to Hobby Lobby one day to browse the kids’ room decor to see if something would spark his interest. We were in and out after a quick five minutes, but I did notice that he stopped to stare at a picture of woodland animal tracks, said, “hmm” and moved on. It turns out that’s one way for a guy to show interest in something! I decided to look at more ideas related to the woodland theme, and after showing him more photos of woodland nurseries, he loved the idea – a woodland nursery it is!
Wall Stenciling
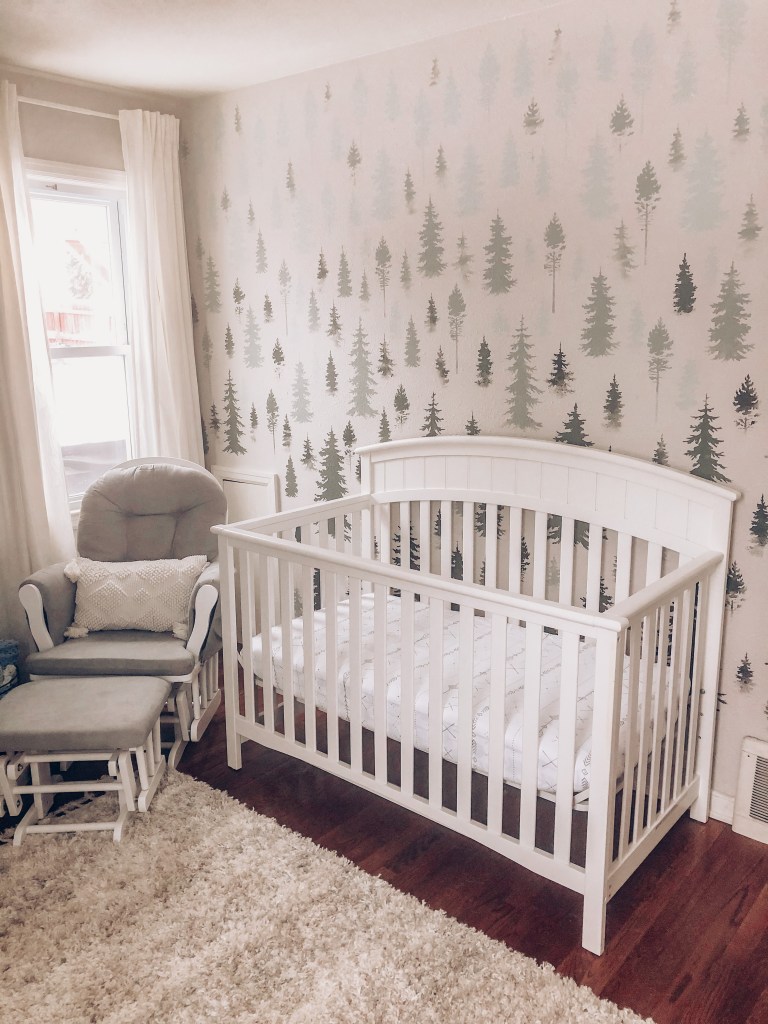
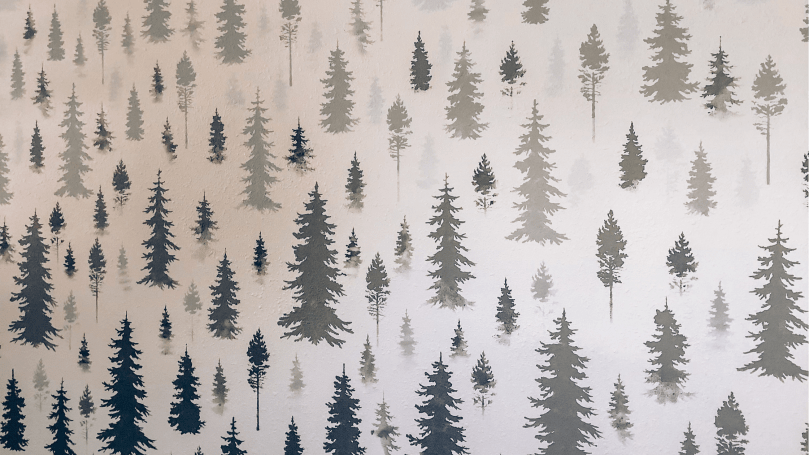
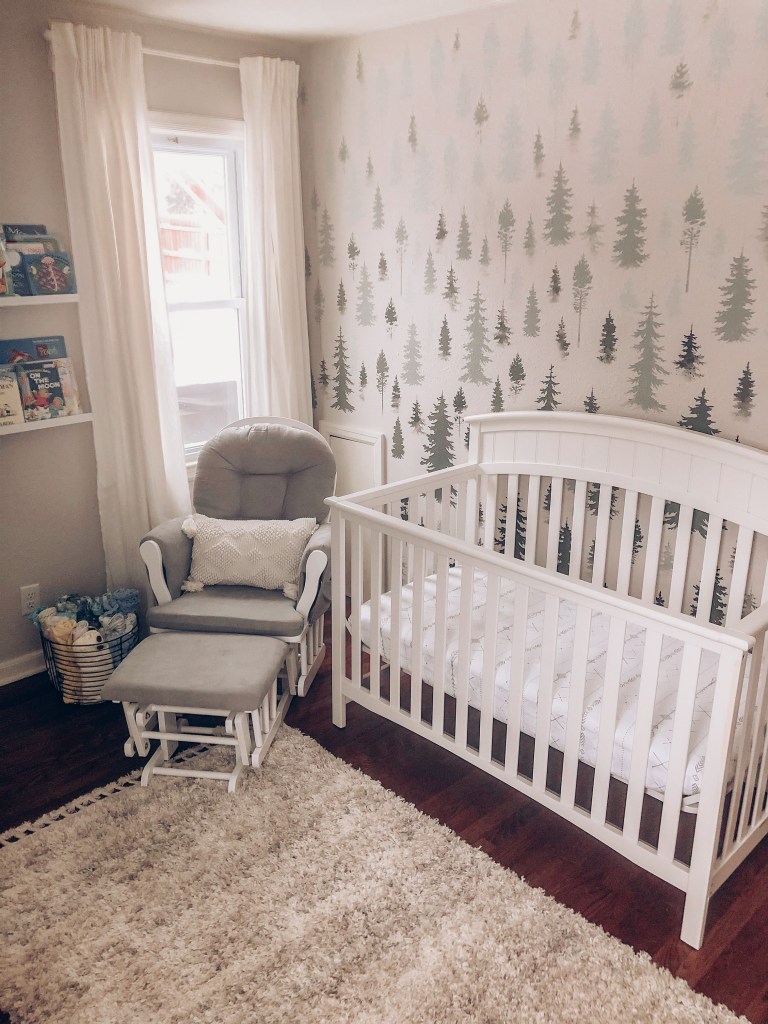
One of my initial ideas for the nursery was to paint a mural or design on the wall where the crib would be. After making the woodland theme official, I immediately recalled a post I had seen on Instagram of a bedroom wall beautifully stenciled with evergreen trees. We thought that incorporating various shades of green trees on one wall would be perfect for the woodland theme. It would be a fun project for me, and would also be appropriate for a boy’s room beyond his first few years.
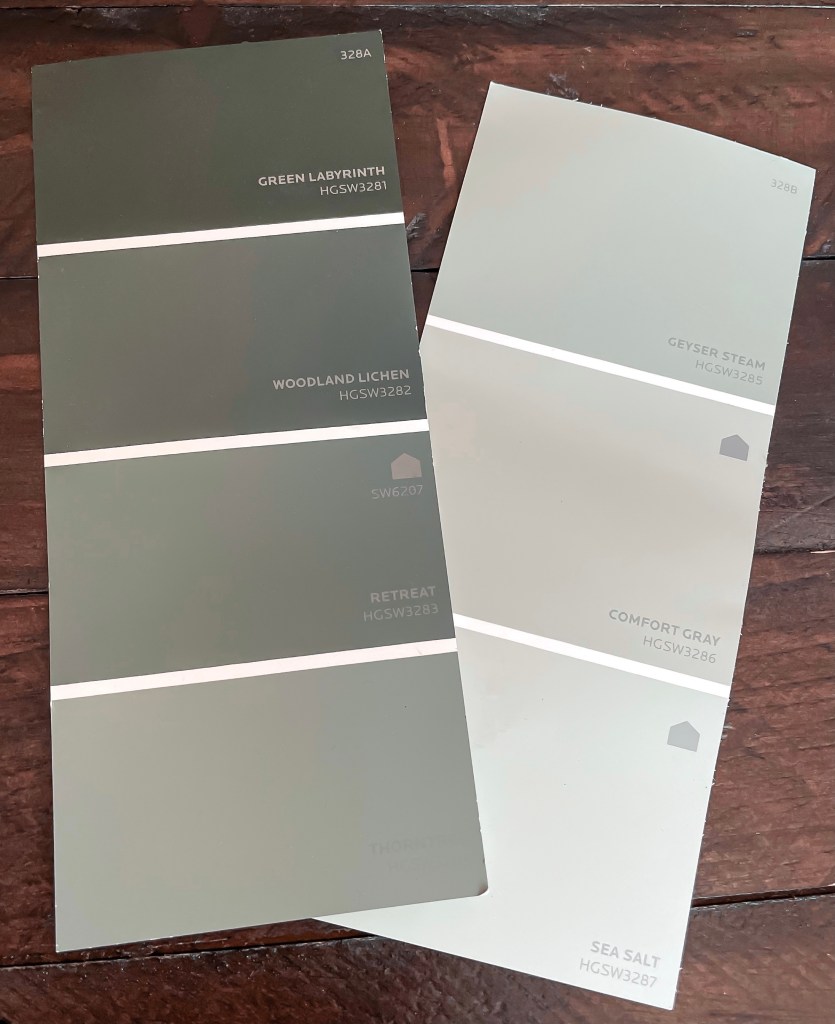
The evergreen tree stencils that I used are from Cutting Edge Stencils. The kit comes with 5 different tree stencils, each a different size. For the tree colors, I chose four shades of green from the same spectrum to create some depth among the different size trees across the wall. We used the following shades of green from Lowe’s: Sea Salt, Geyser Stream, Retreat, and Woodland Lichen. We also repainted the whole room with a white/gray color to be cohesive with the shades of green. We used the color Sincere White.
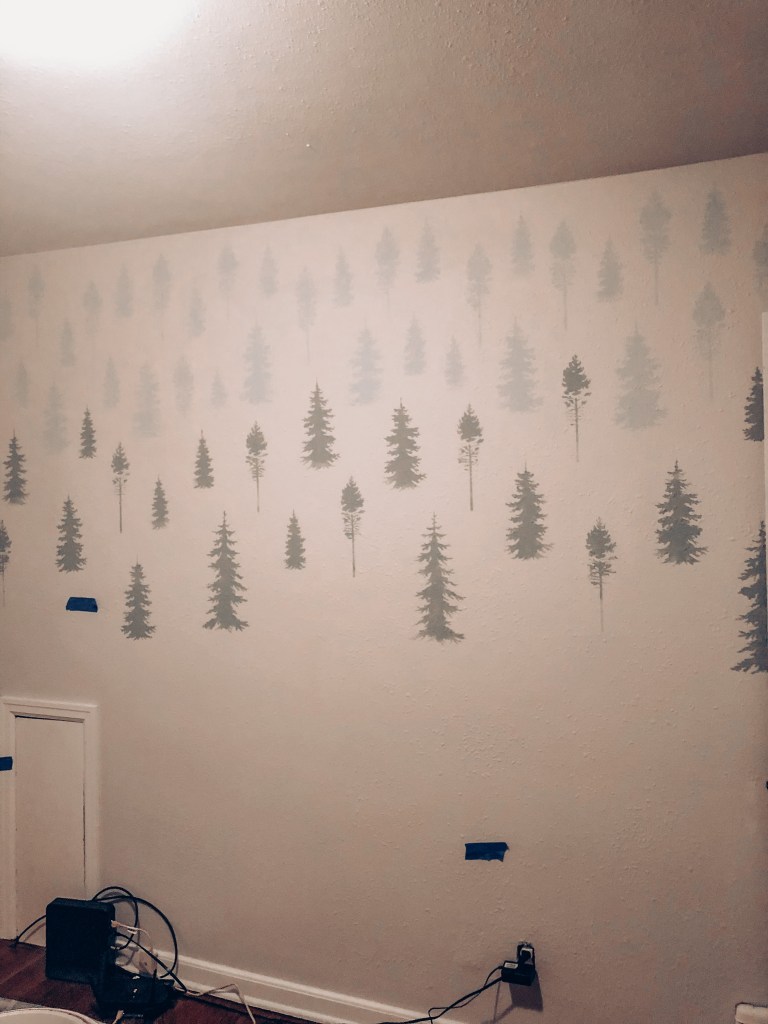
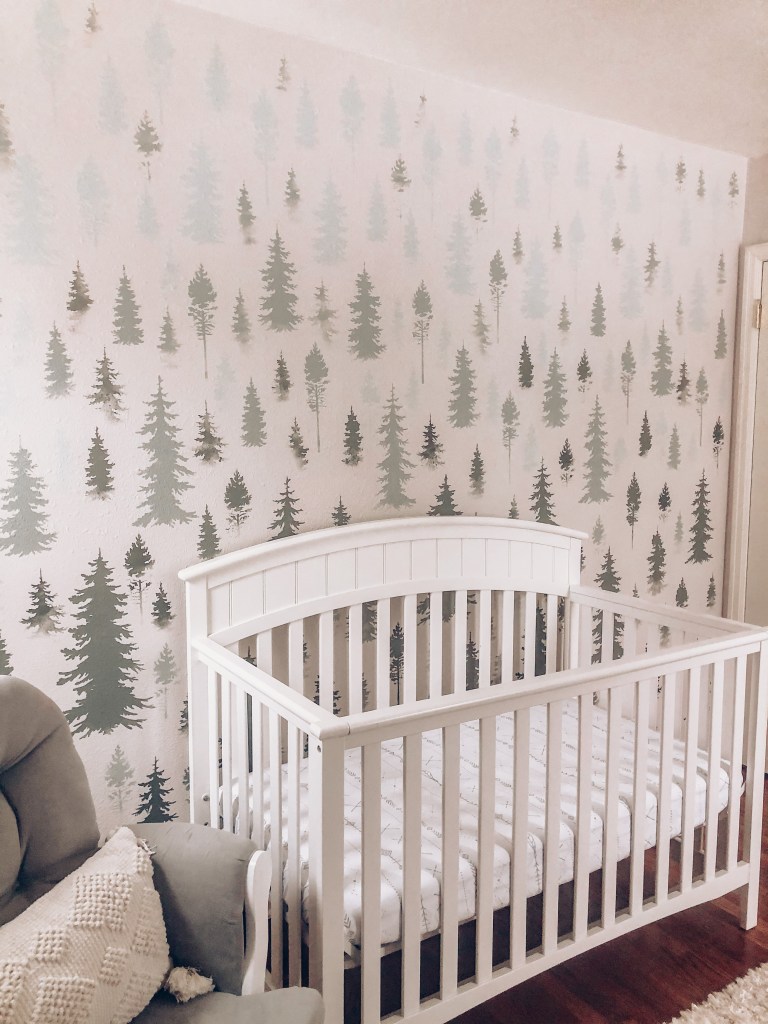
I do not consider myself extremely artistic, so thankfully I found a blog post that explains the simple technique used to create the forest look. The trick is to use a mini paint roller with very little paint on it. This helps to create a faded look near the bottom of the tree or on some of the branches. When the stencil is removed from the wall, the tree then looks farther away and as if some parts are covered with forest mist. I used the lightest shade of green with the smaller stencils at the top of the wall, and gradually used bigger stencils and the darker shades of green as I worked down the wall. I painted full trees across the whole wall first, then filled in the open spaces with treetops using varying shades of green to help transition the colors down the wall. Once completed, we had a beautiful “forest” fit for all things woodland!


Furniture
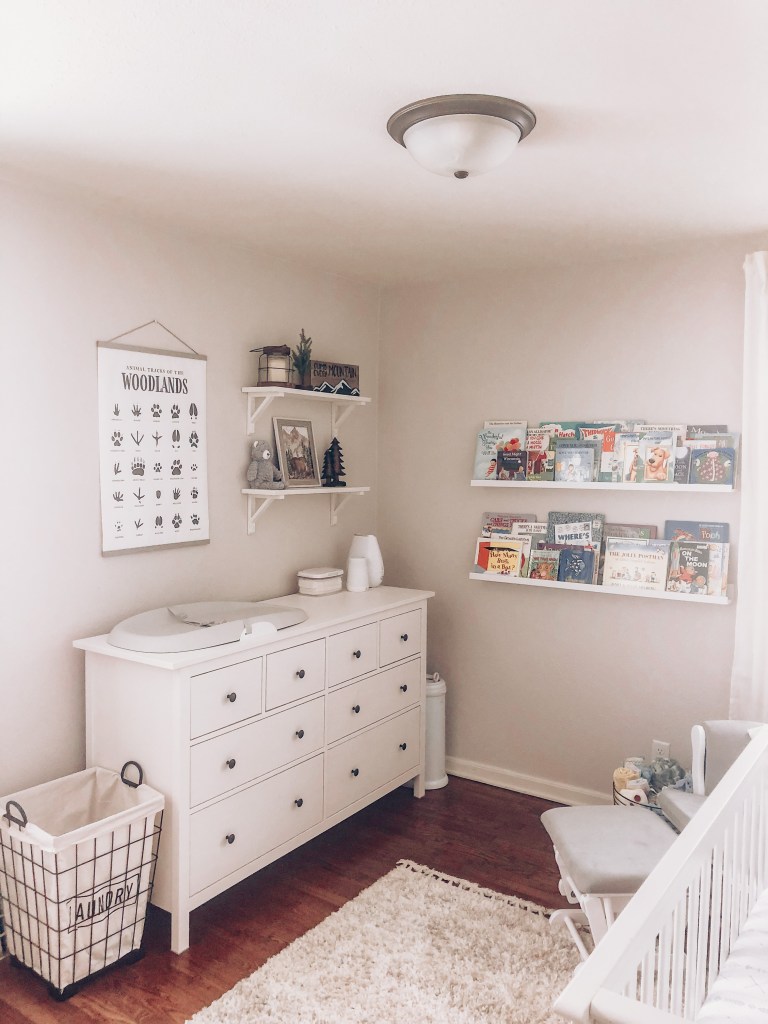
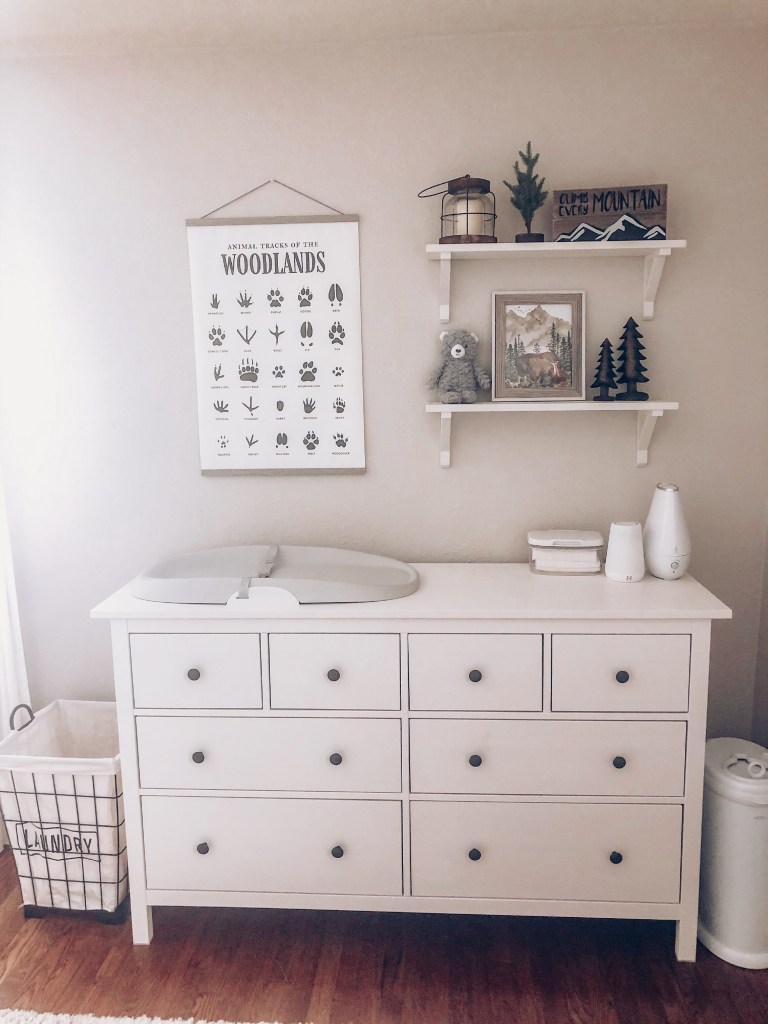
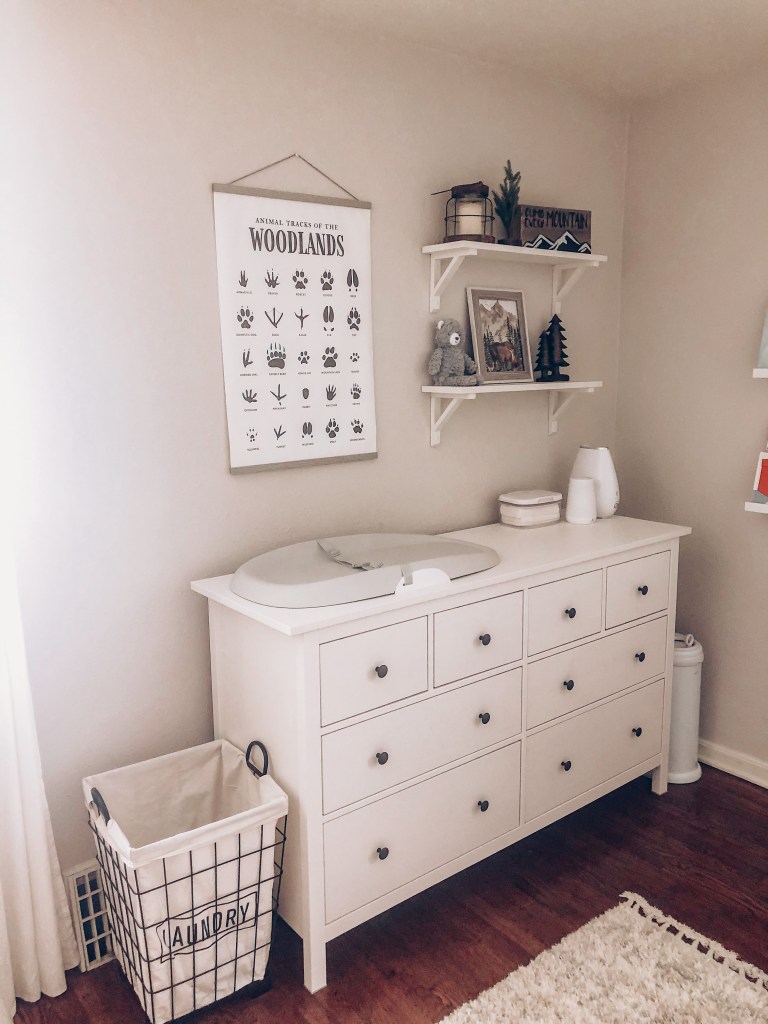
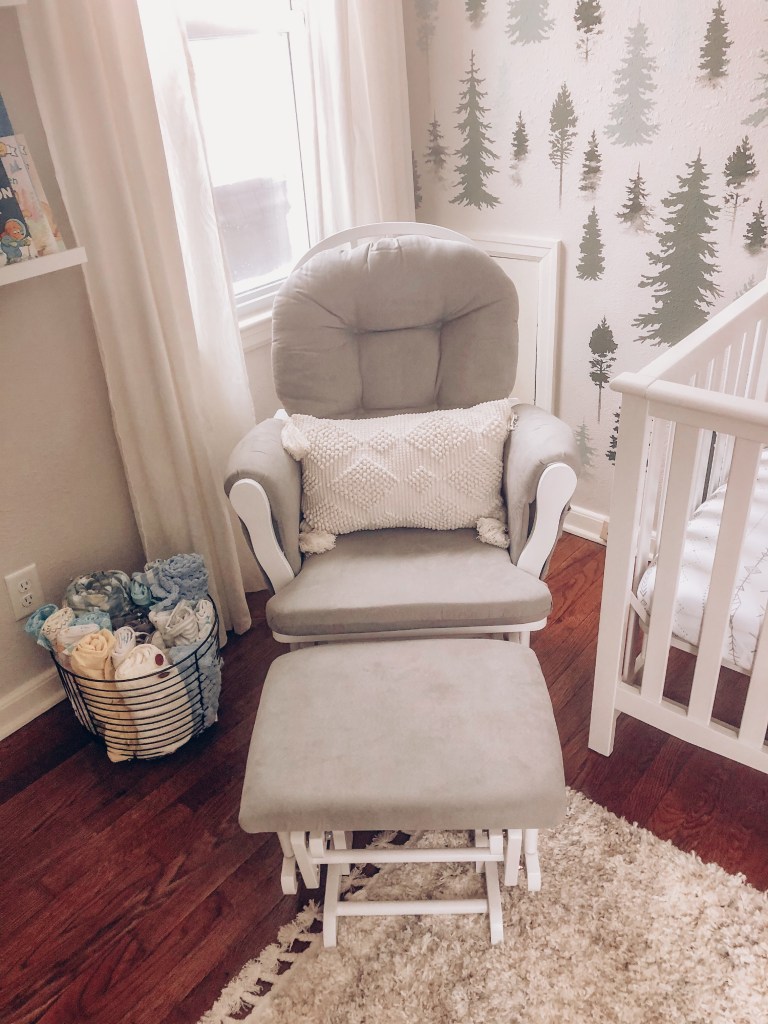
For furniture, we chose white pieces to give the room a calm, neutral look. I especially love how the white crib looks against our forest wall! Of course, the popular Hemnes dresser from Ikea was a must for all of Baby Boy’s clothes and accessories. Lastly, is our comfy glider in the corner near the crib.
Book Shelves
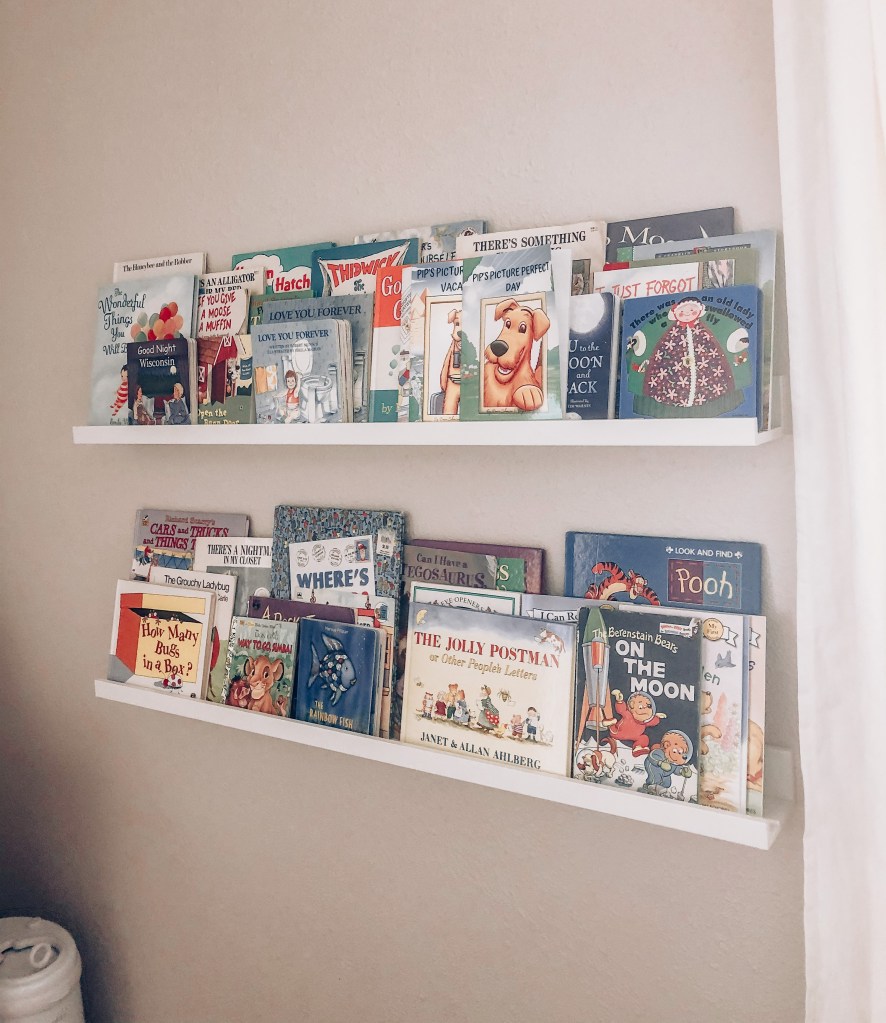
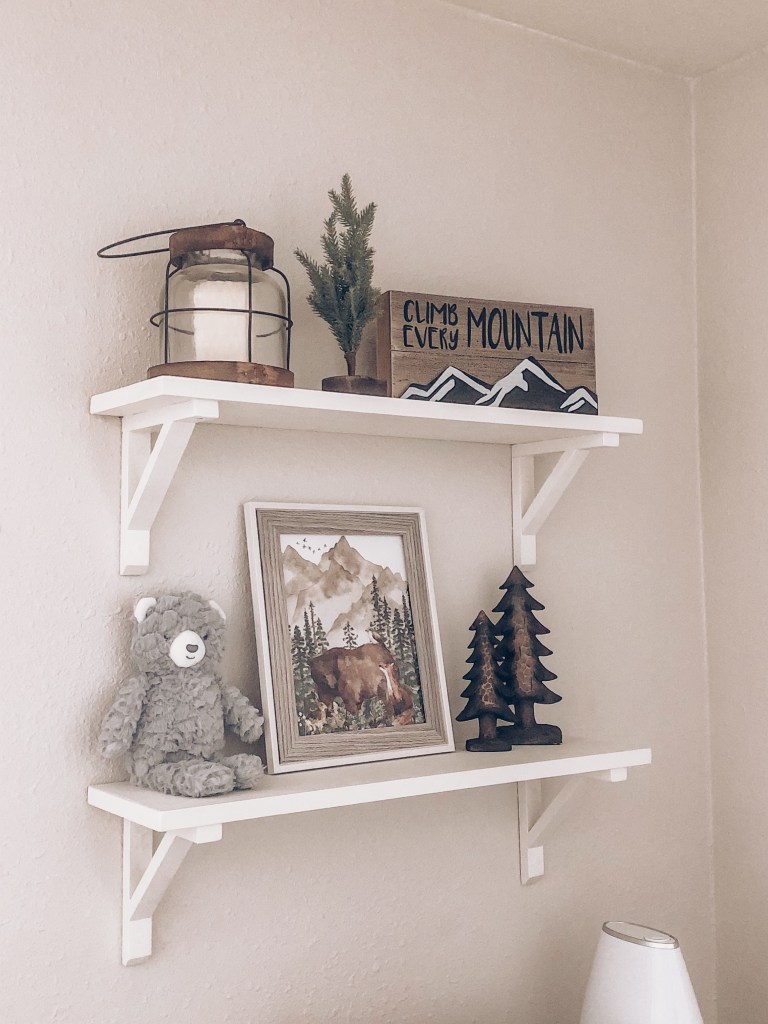
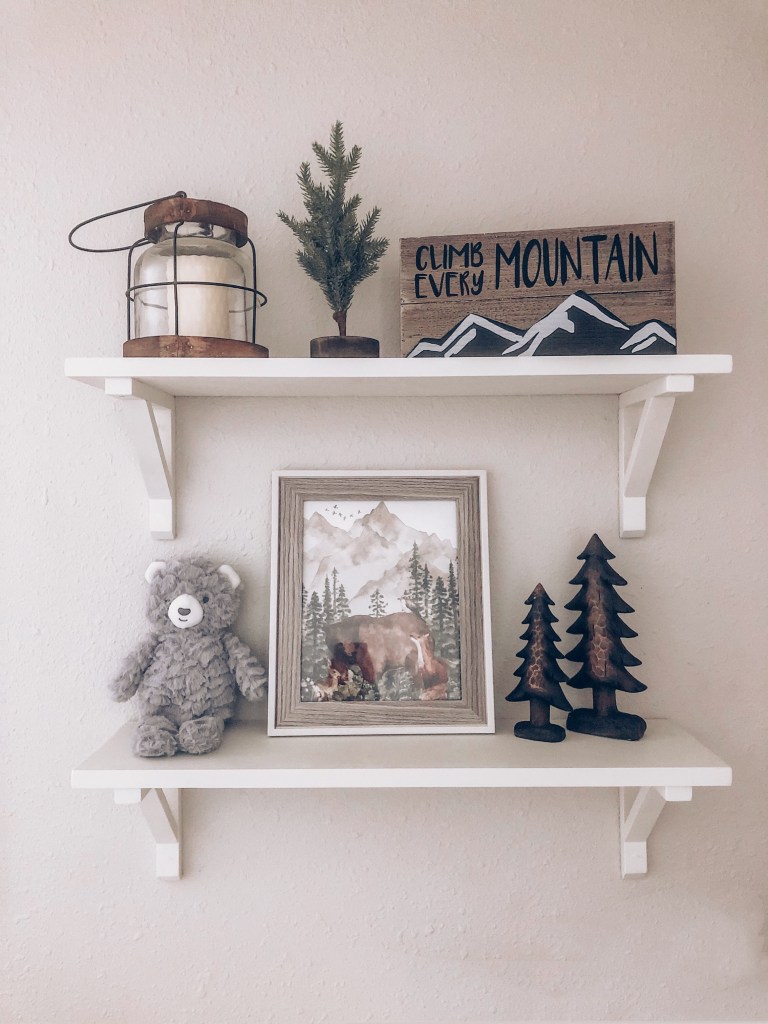
A fun, space-saving way to display books in a room is to use picture frame ledges instead of a bookshelf. Displaying Baby Boy’s books was important to me, so we chose to add two ledges to one of the more open walls in the room. These ledges from Ikea are super affordable and beyond easy to install!
Decor
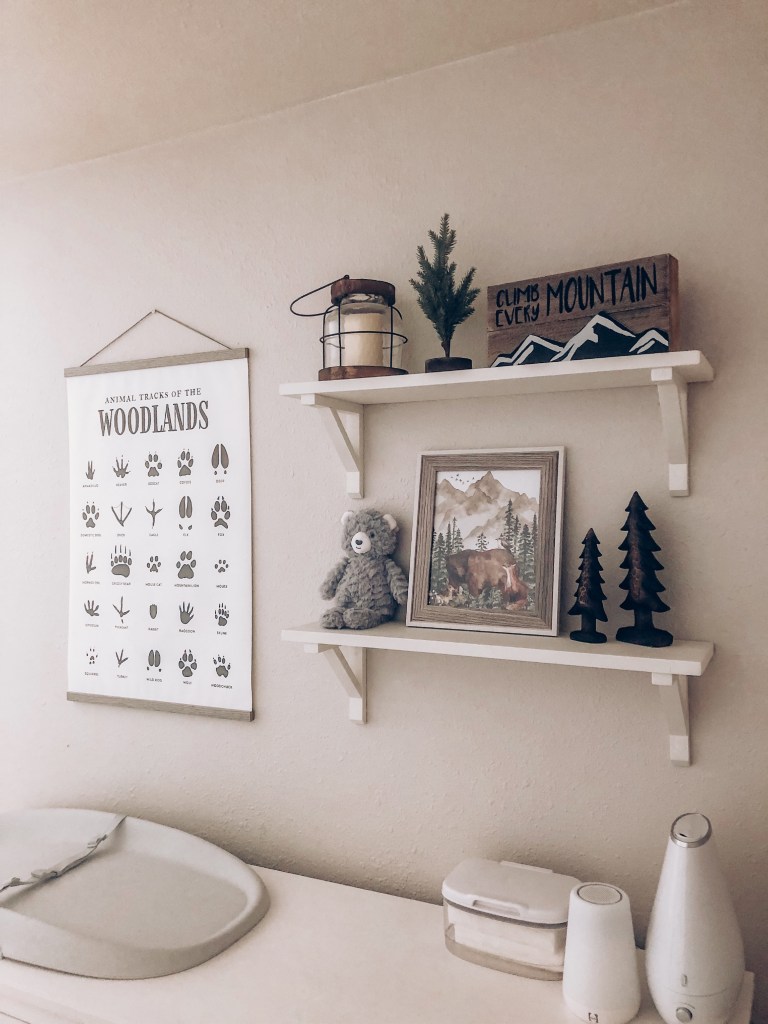
Since my husband liked the look of the animal track picture he’d seen, I wanted to find something similar that would be perfect for above the dresser (which would also function as a changing table). I found this beautiful print from Little Folk Printables on Etsy and placed it in a light gray hanging magnetic frame.
Next to the animal track print, we hung two white shelves to place decor and other functional items. These shelves were actually an easy DIY! We bought wood shelf brackets from IKEA, some wood, and painted everything white before assembling the brackets to the wall, then the wood to the brackets. On the shelves, I have another woodland print from Benji and Bear on Etsy, some wooden trees and sign from Hobby Lobby, and a few other “woodsy” items that I found around the house.
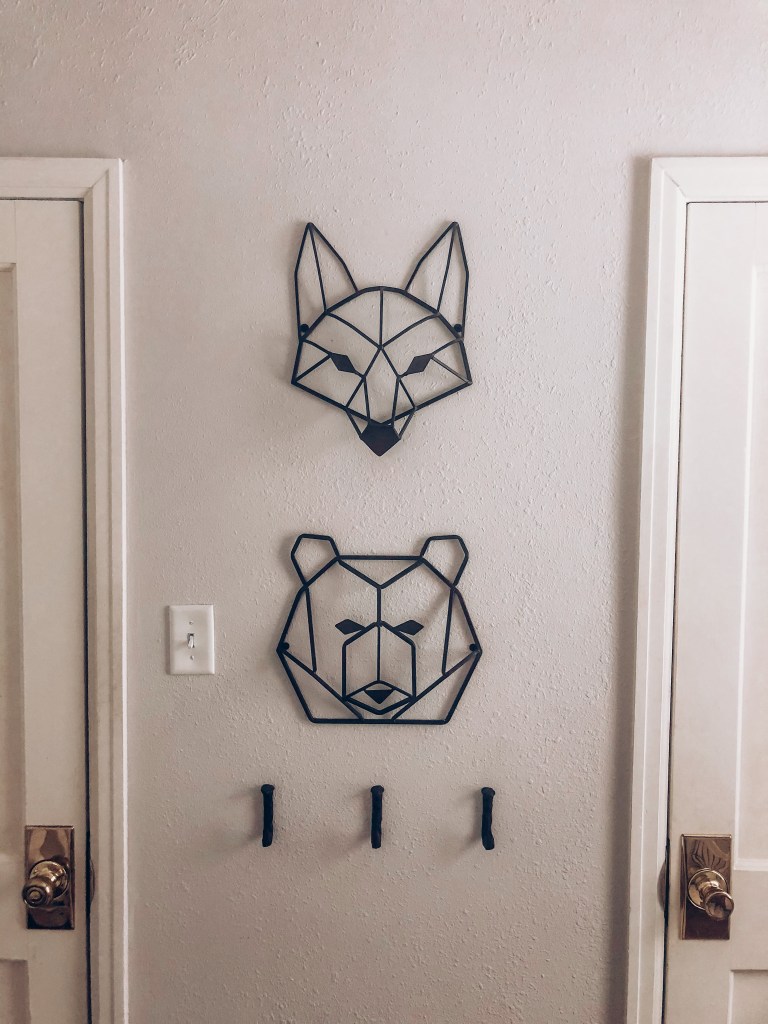
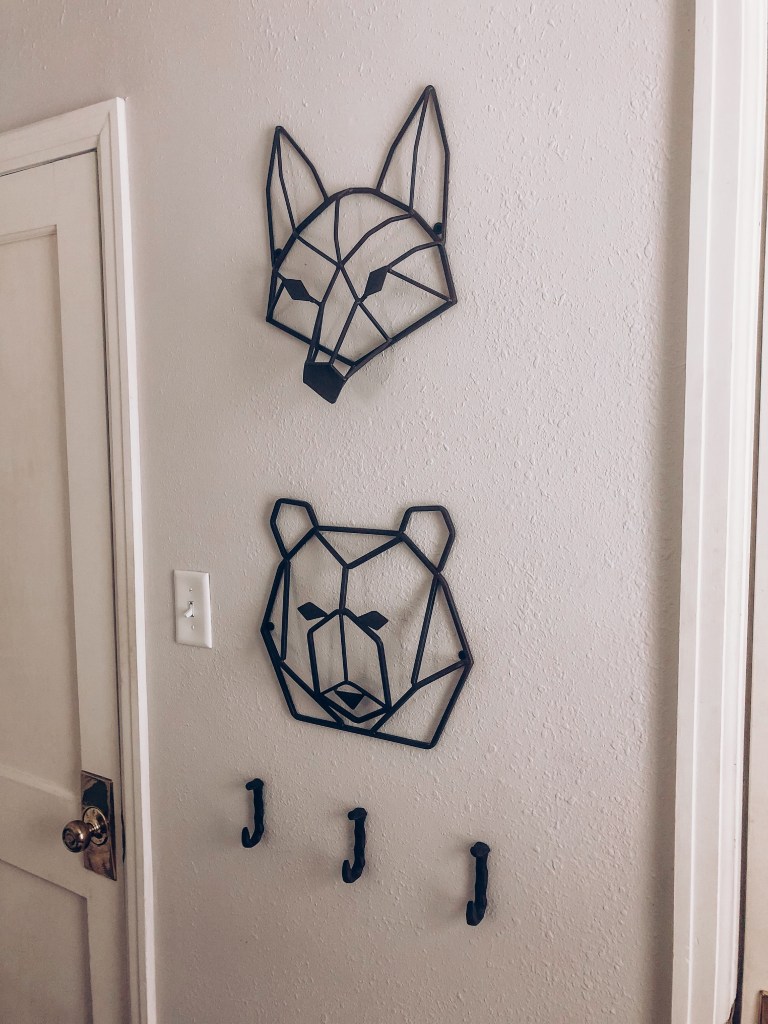
The metal animal heads (fox and bear) were something I knew I had to have for our woodland nursery when I first saw them at Hobby Lobby. I wanted some darker metal items in the room to match the dark dresser drawer pulls. These were perfect to hang on the wall space between the bedroom and closet doors. We also bought three wall hooks that matched to place under them.
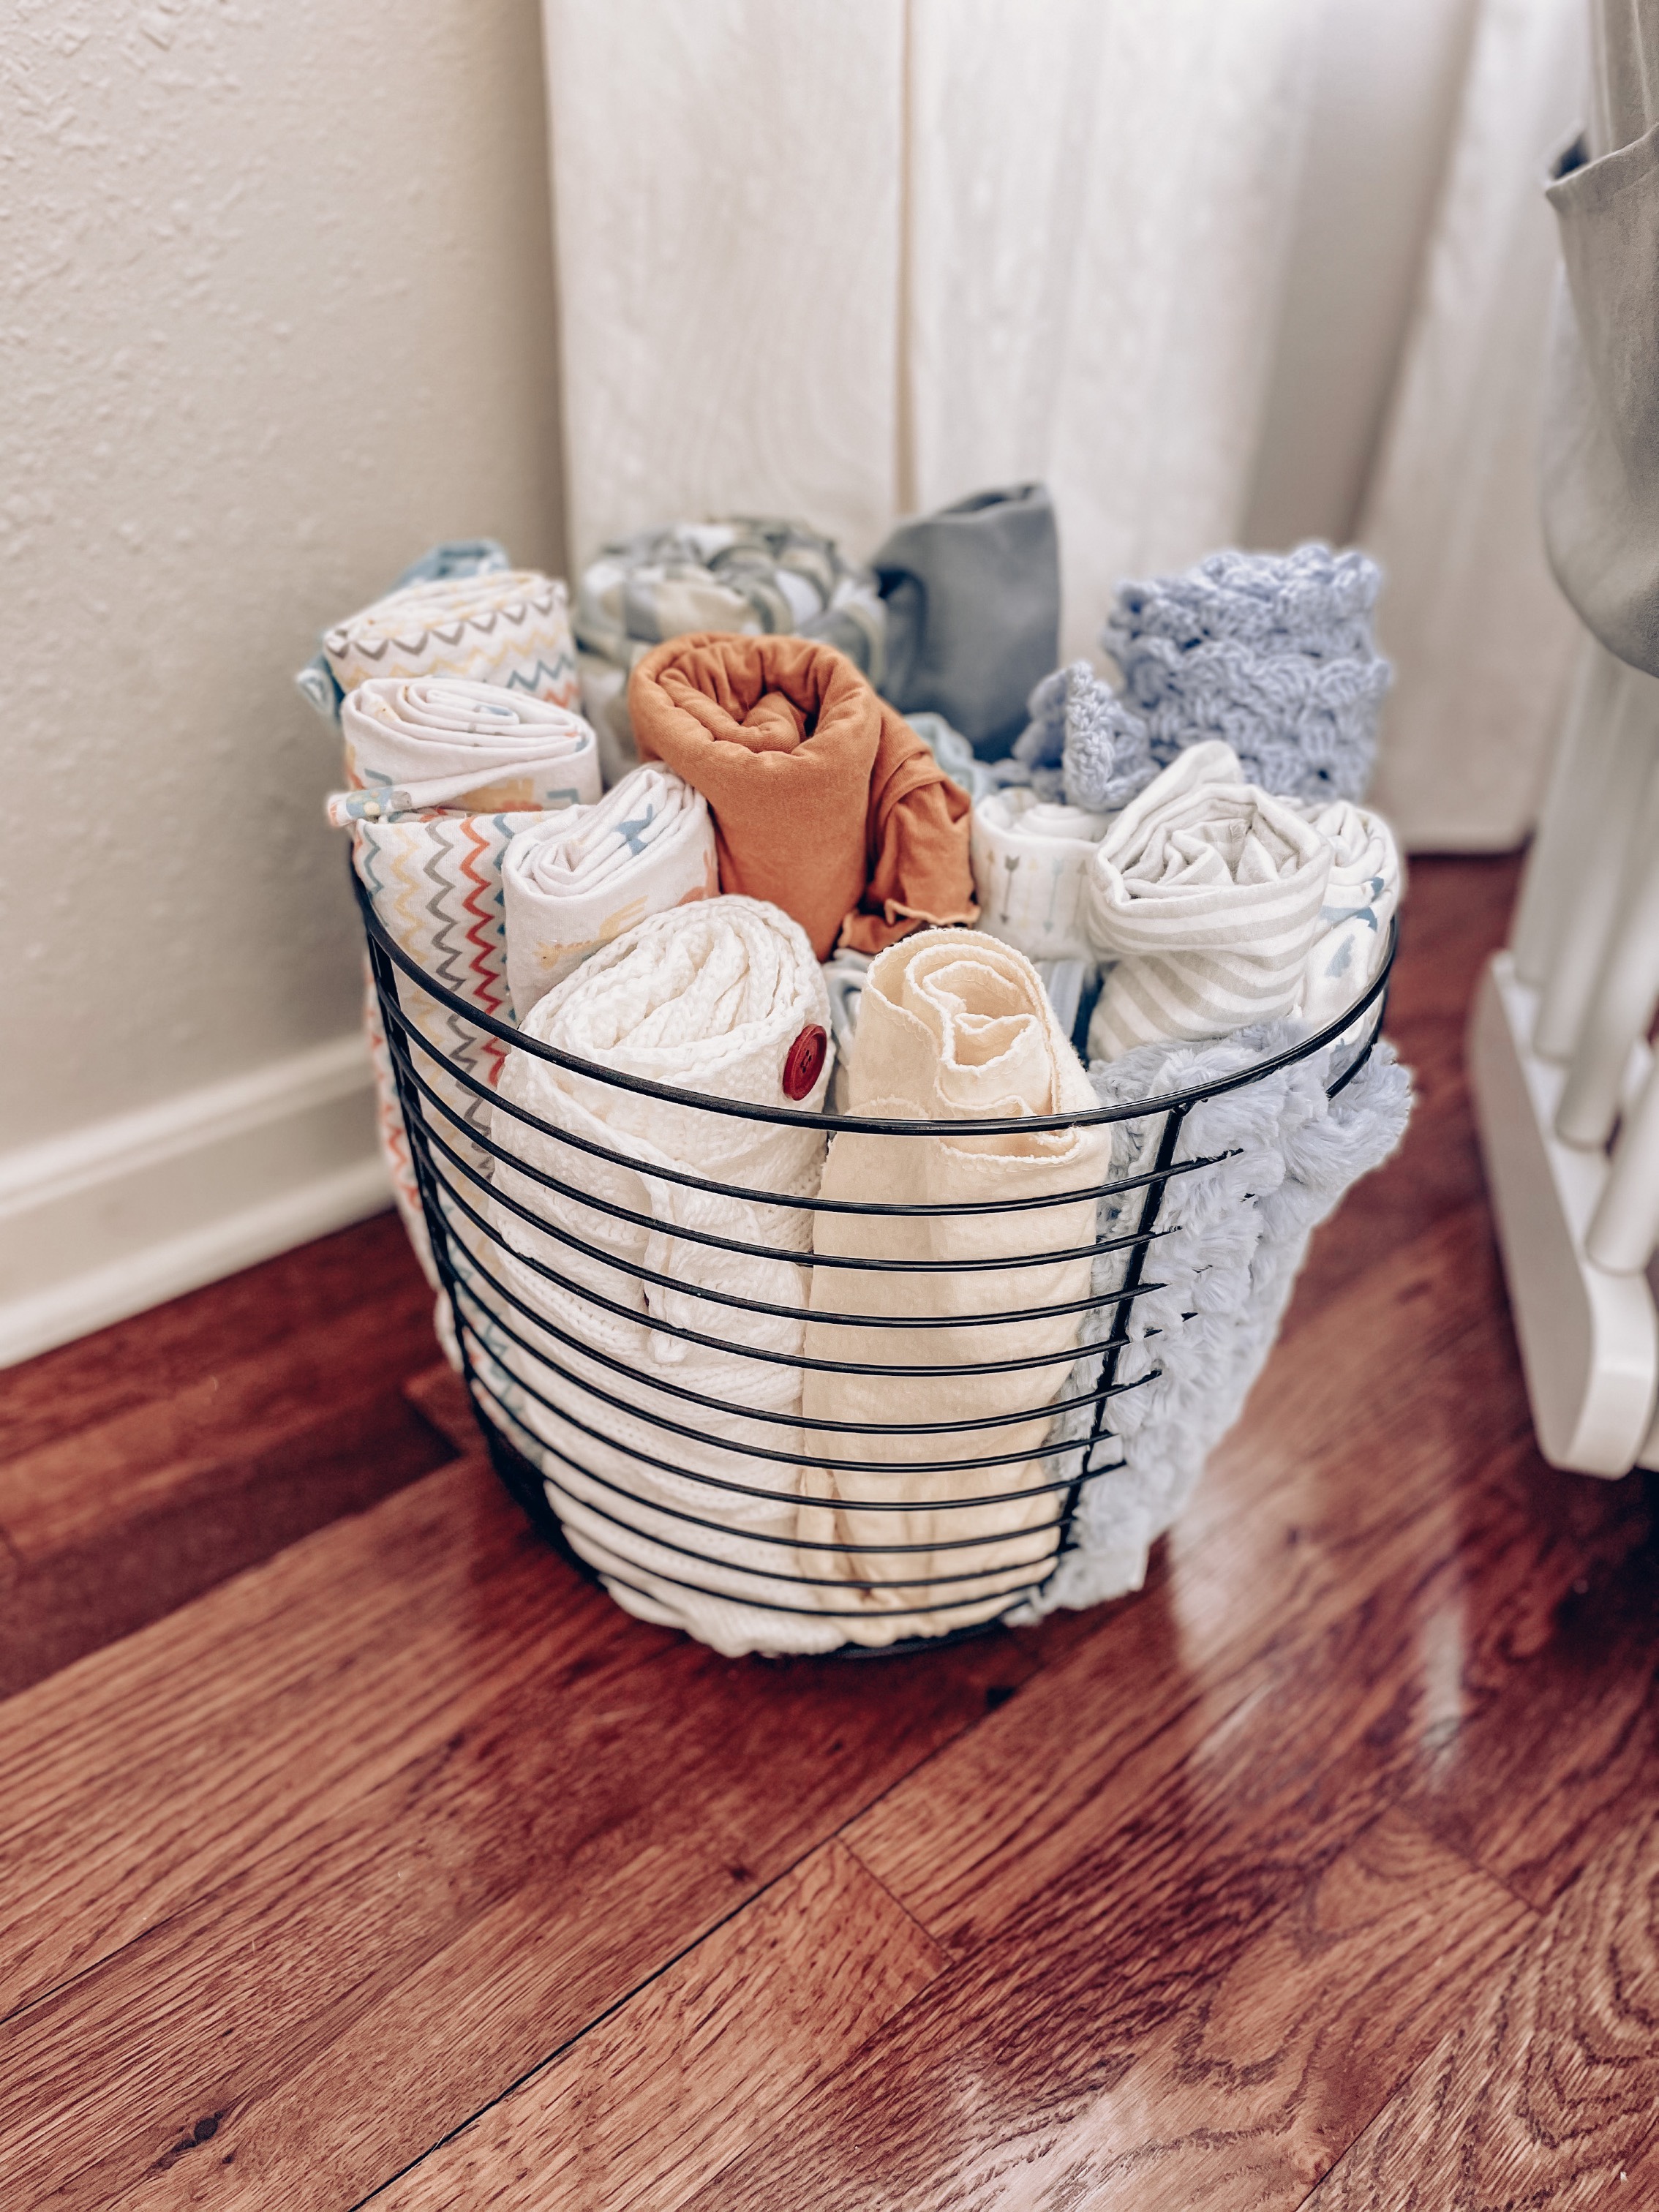
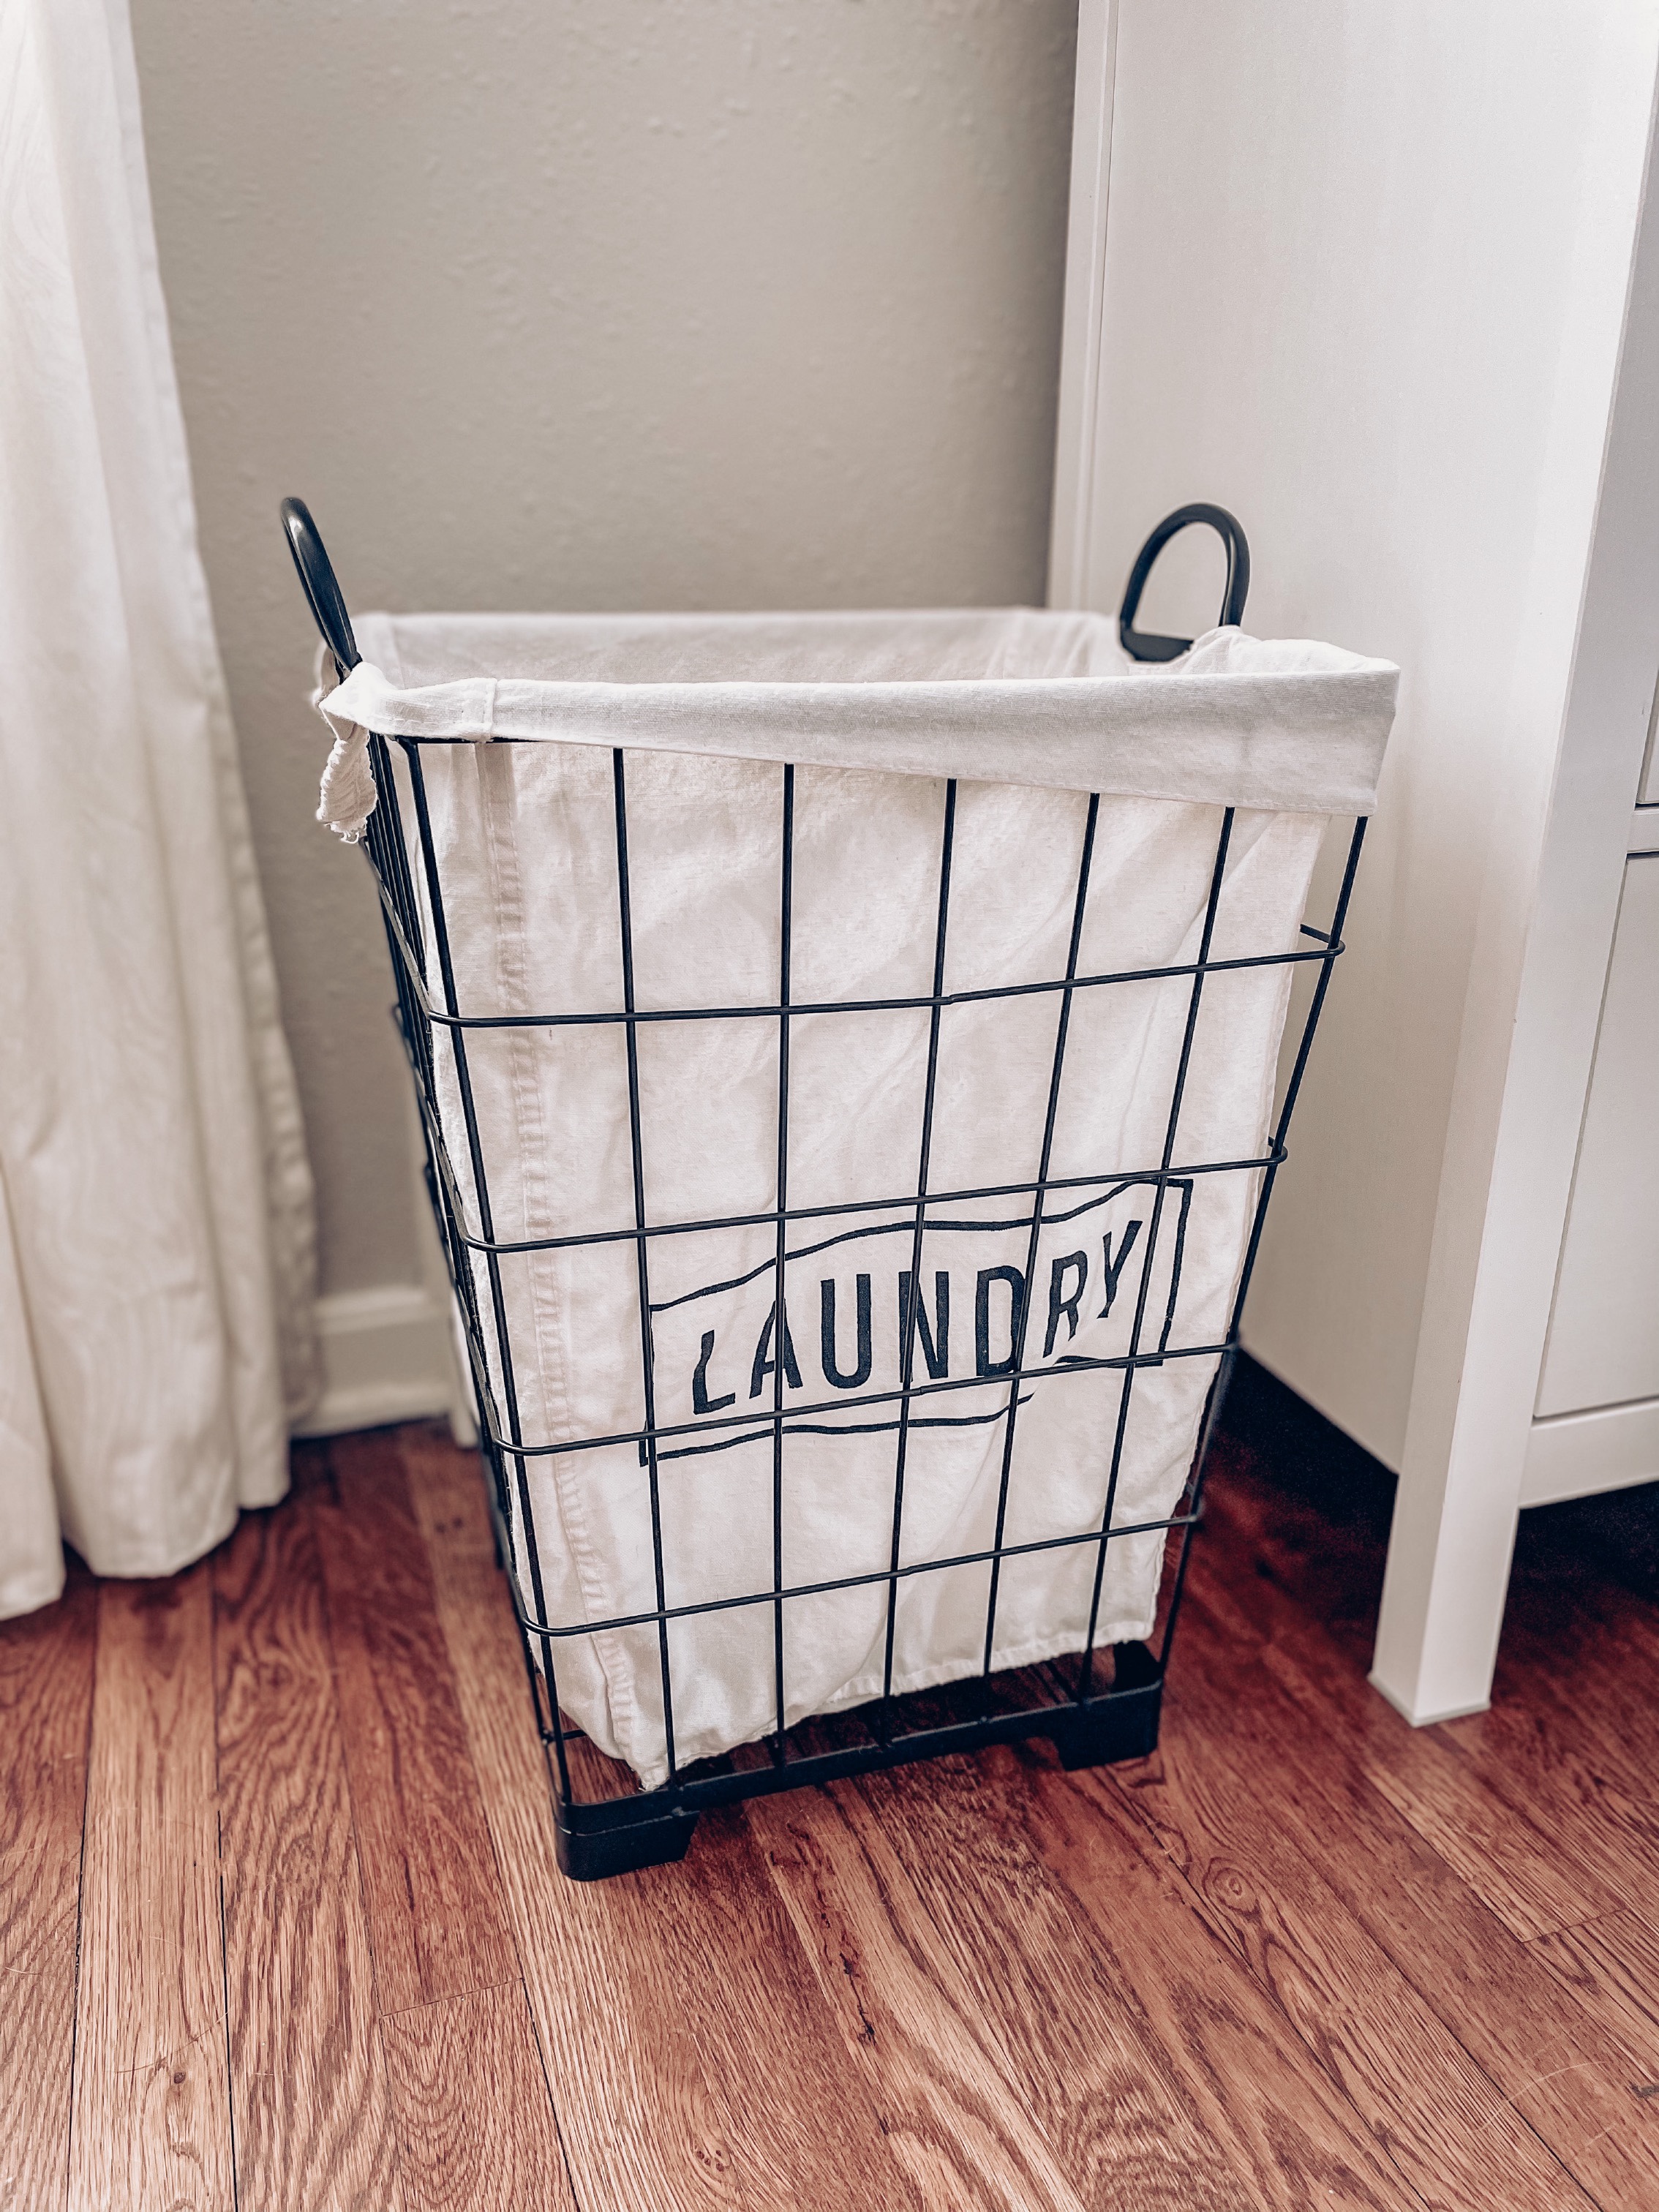
To hold some of the baby items throughout the room, such as blankets and laundry, I chose black metal baskets for blankets and laundry to continue the black metal detail throughout the room.
Lastly, the curtains we chose were also from Ikea and perfect for our theme as the curtains have a subtle wood grain print on them. To finish the room, we added a 4’x6′ beige/gray rug from Rugs USA.

Closet Organization
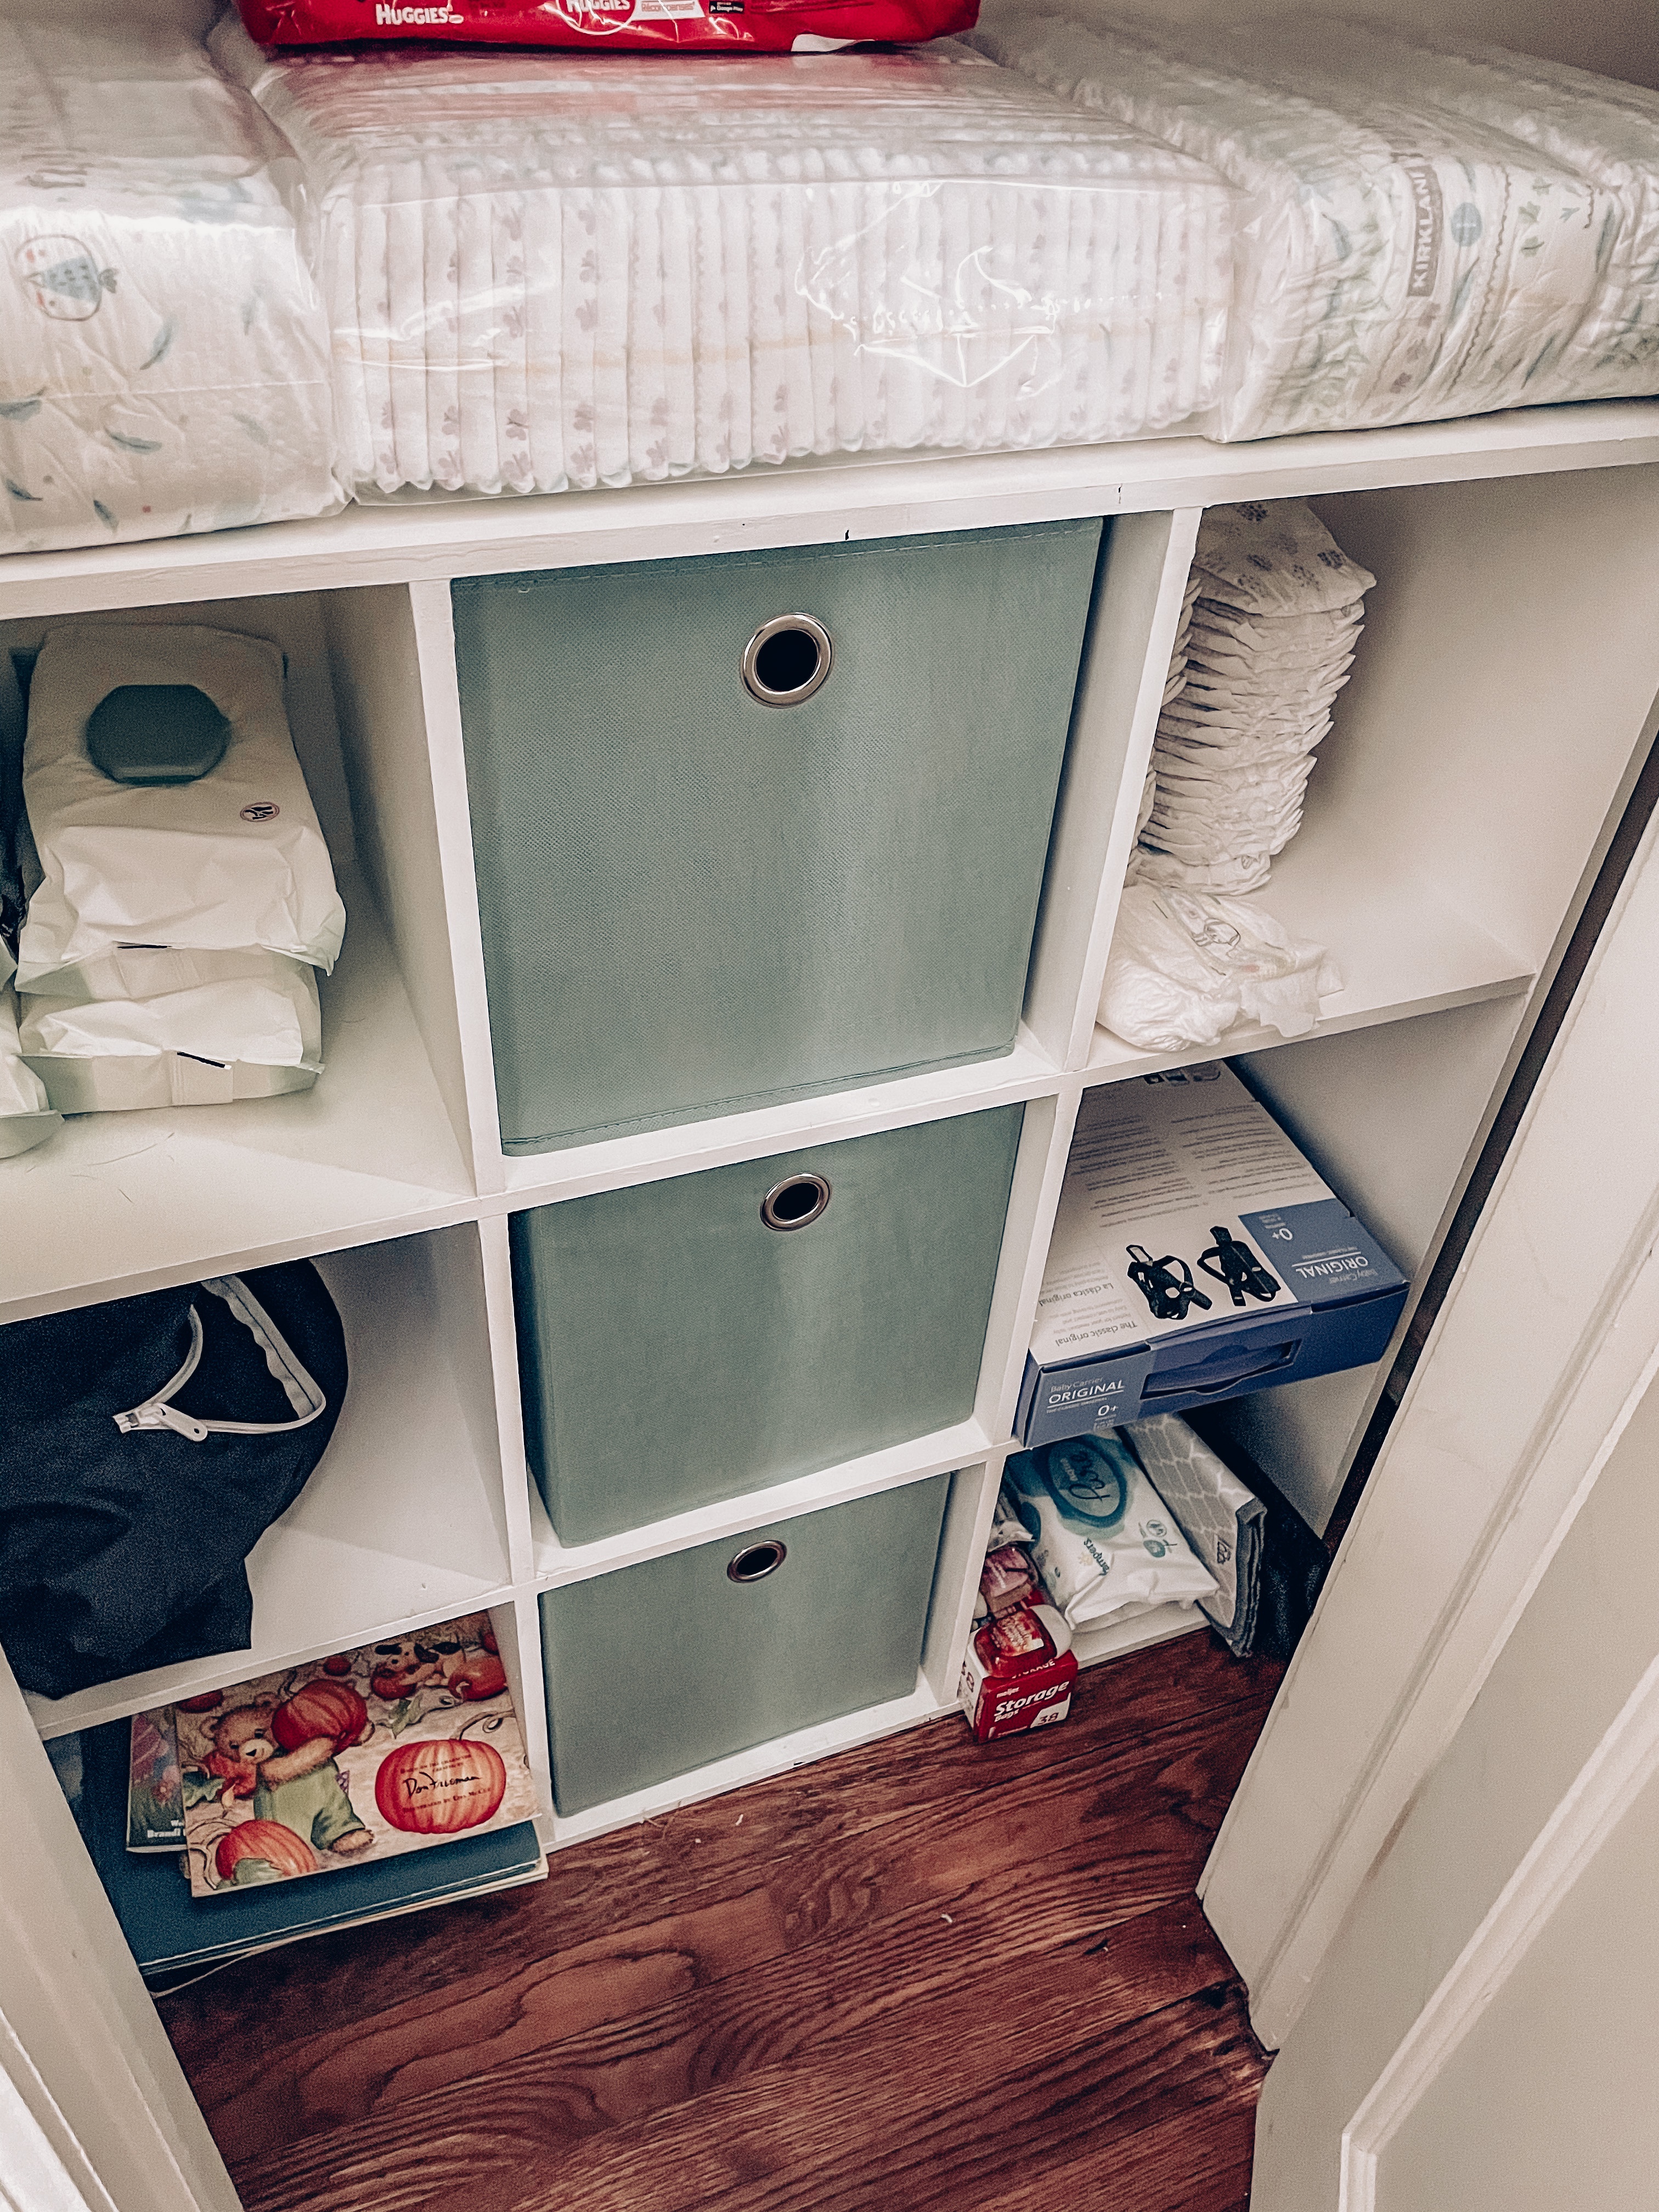
To organize all of Baby Boy’s adorable outfits, I purchased clothes dividers so I can hang all of them according to size. I also repainted a cube shelf that we had (white of course) to match the rest of the furniture, and I purchased some green bins to store all of the crib sheets, extra diapers, and accessories in.

And that’s a finished nursery! It was a process, but we love how it turned out! We hope it’s a fun, peaceful place that our little one will love for years to come. Thanks for stopping by!