Winter Home Tour

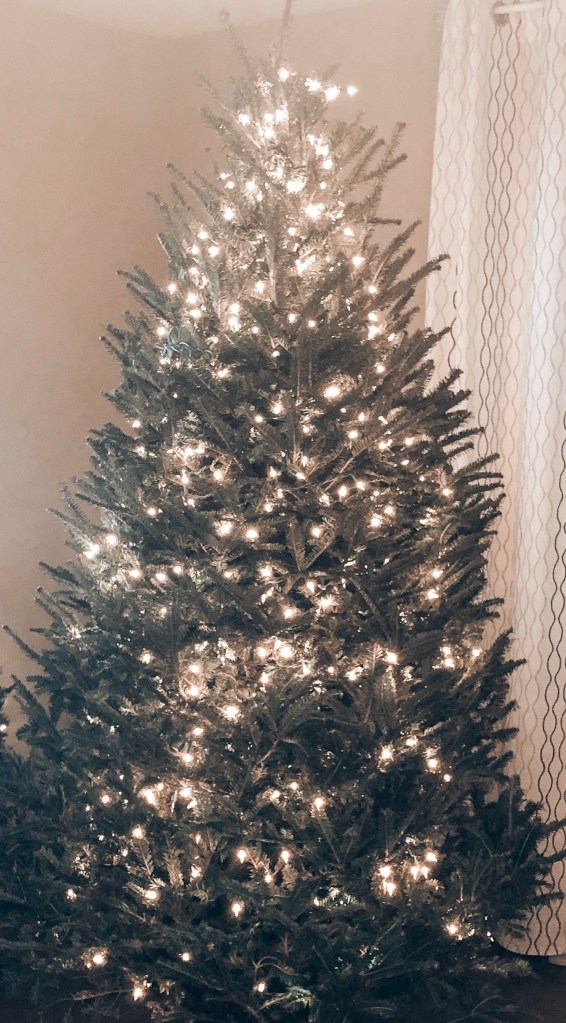
After the Christmas decor has gone away, our home seems a bit plain and our living room feels like it has gained lots of extra square footage with the absence of the Christmas tree. Since we live in Wisconsin, the winter months drag on well after the New Year. Here, warm weather doesn’t spring up until the end of April. Believe it or not, one year we got 12 inches of snow in May! CRAZY! So, the dilemma: I don’t want to leave my Christmas decor up past early January, and given our weather it doesn’t feel right to put up spring decor before late March. This is how I knew I needed to have another “season” of decor for our Wisconsin winters.

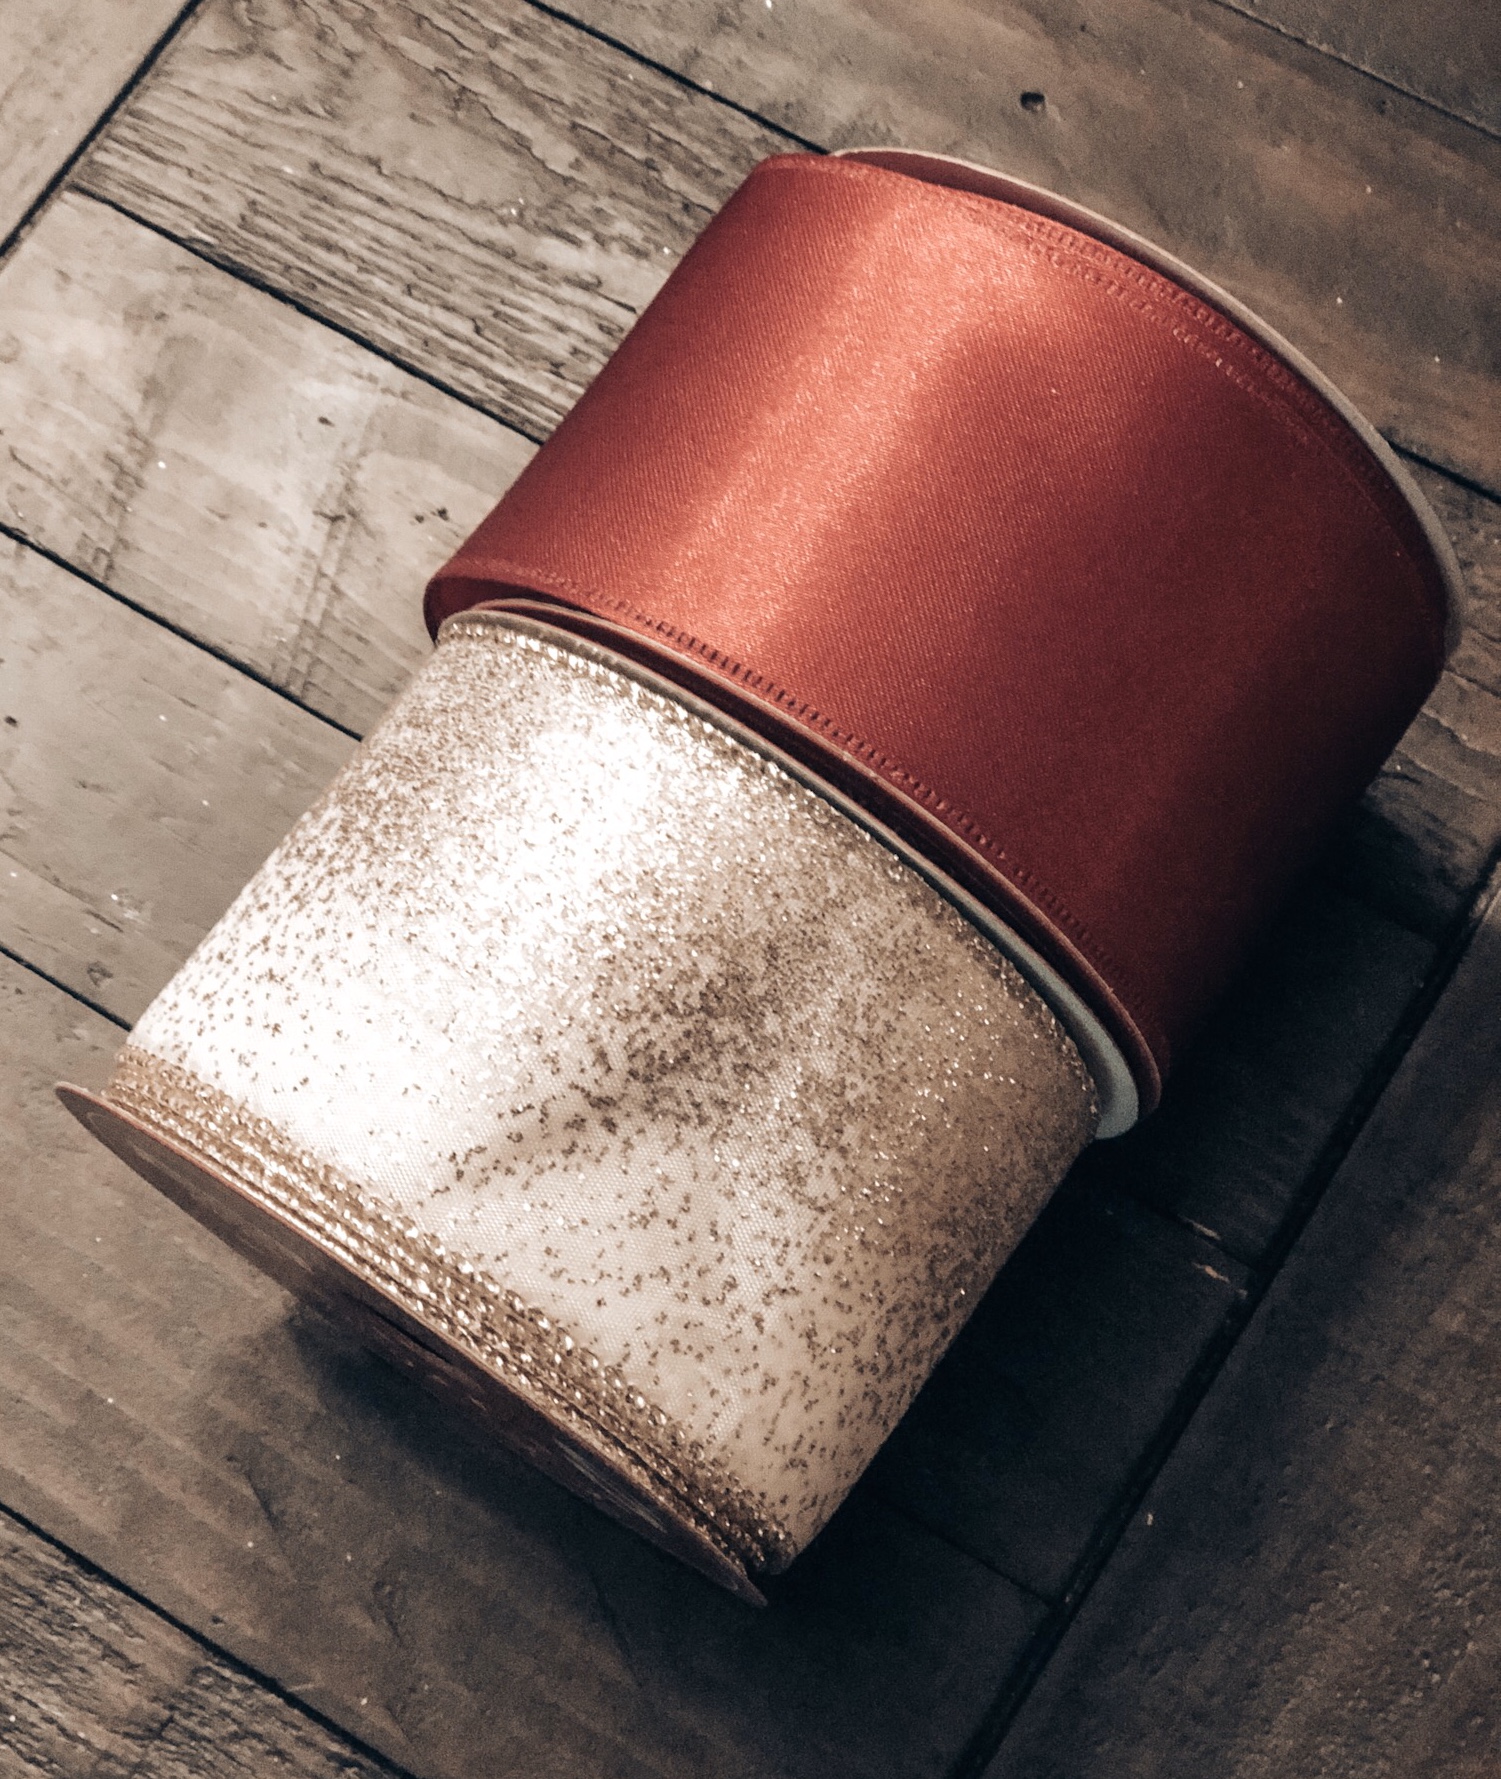
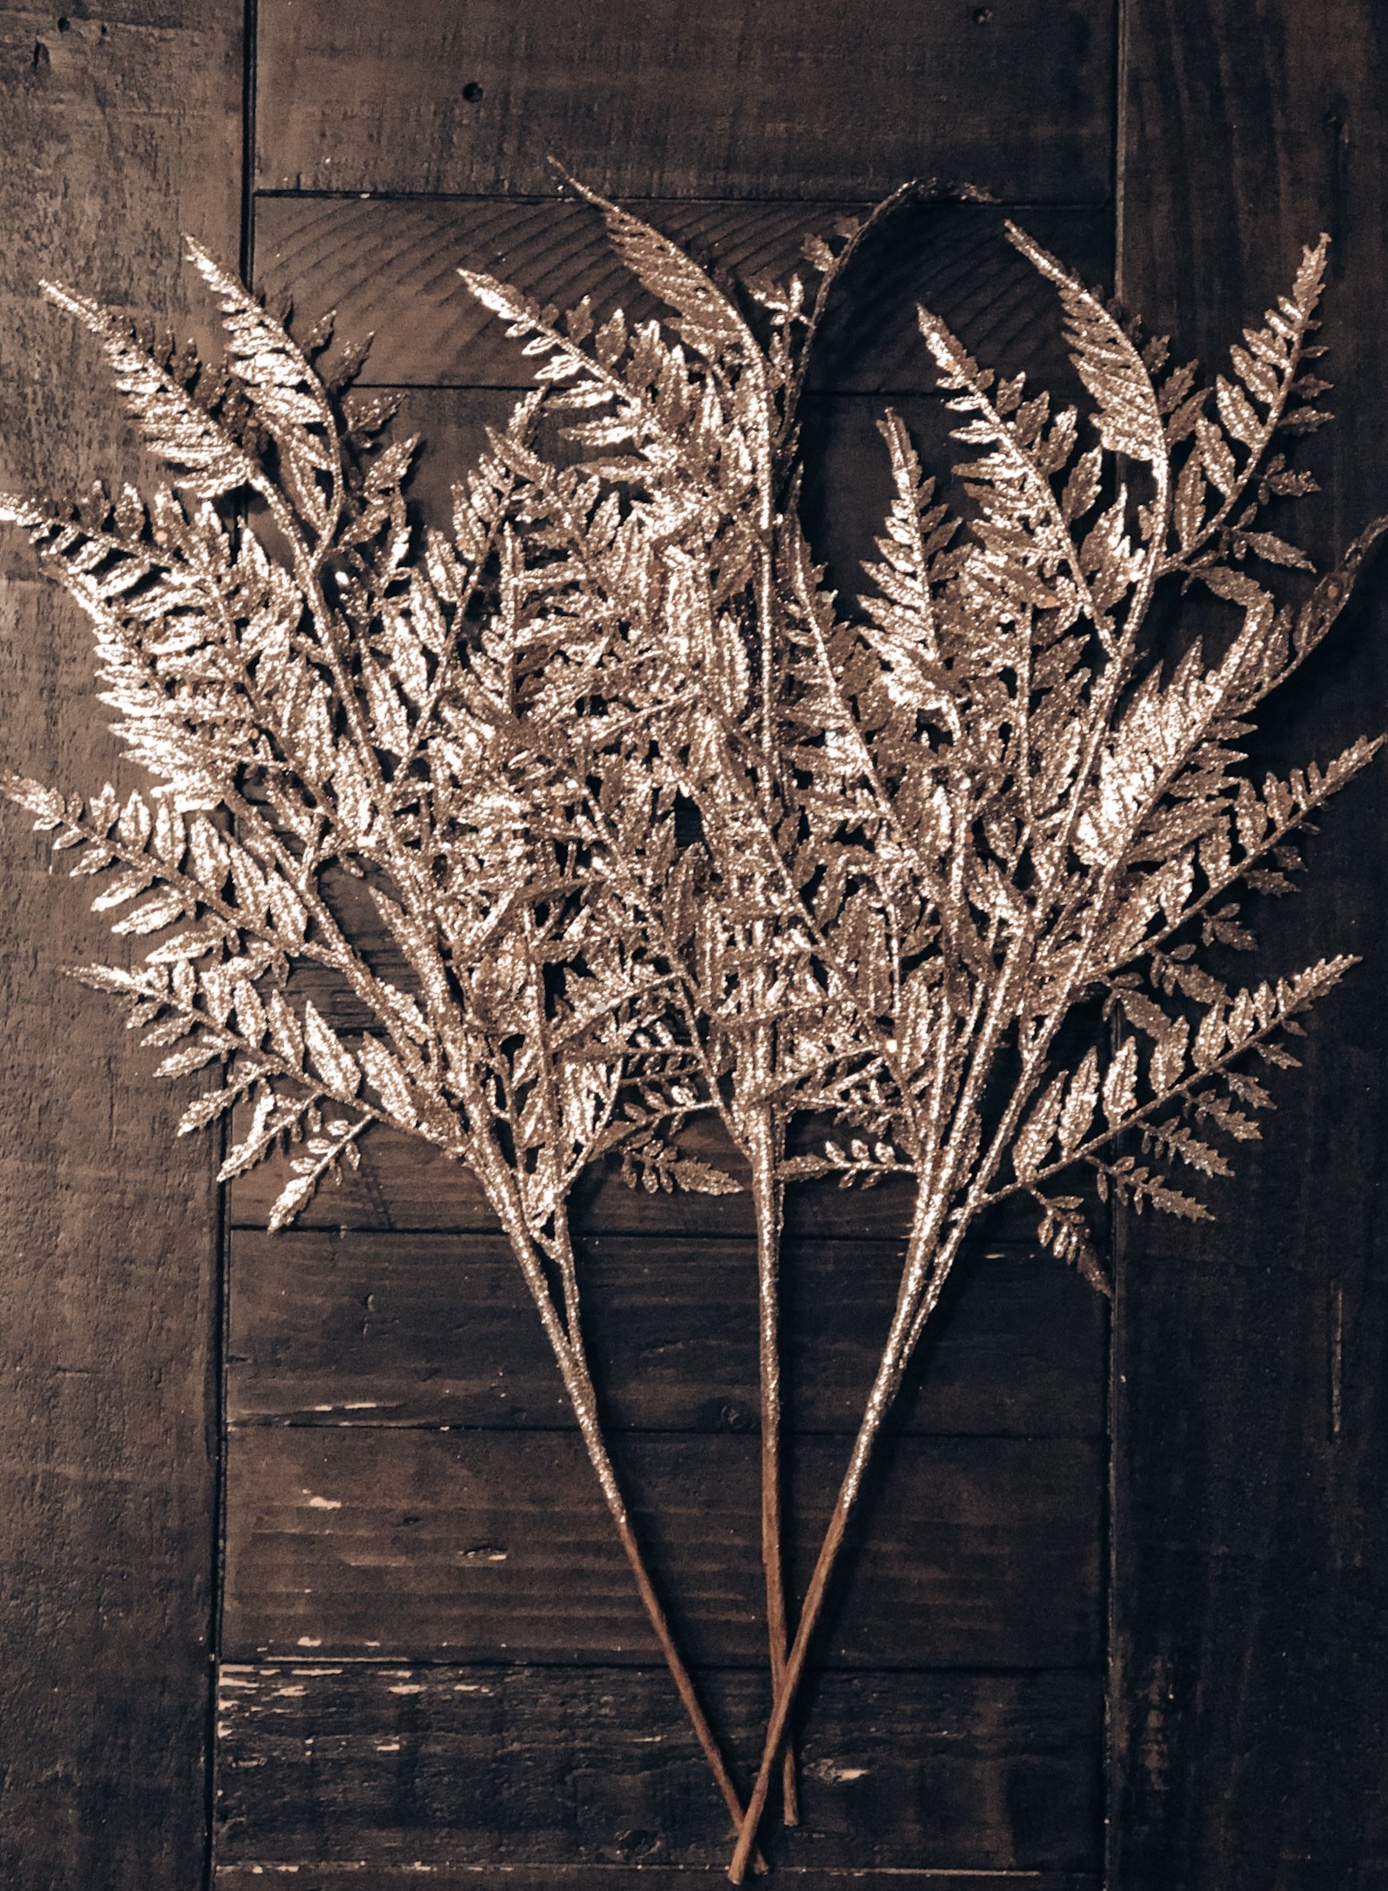
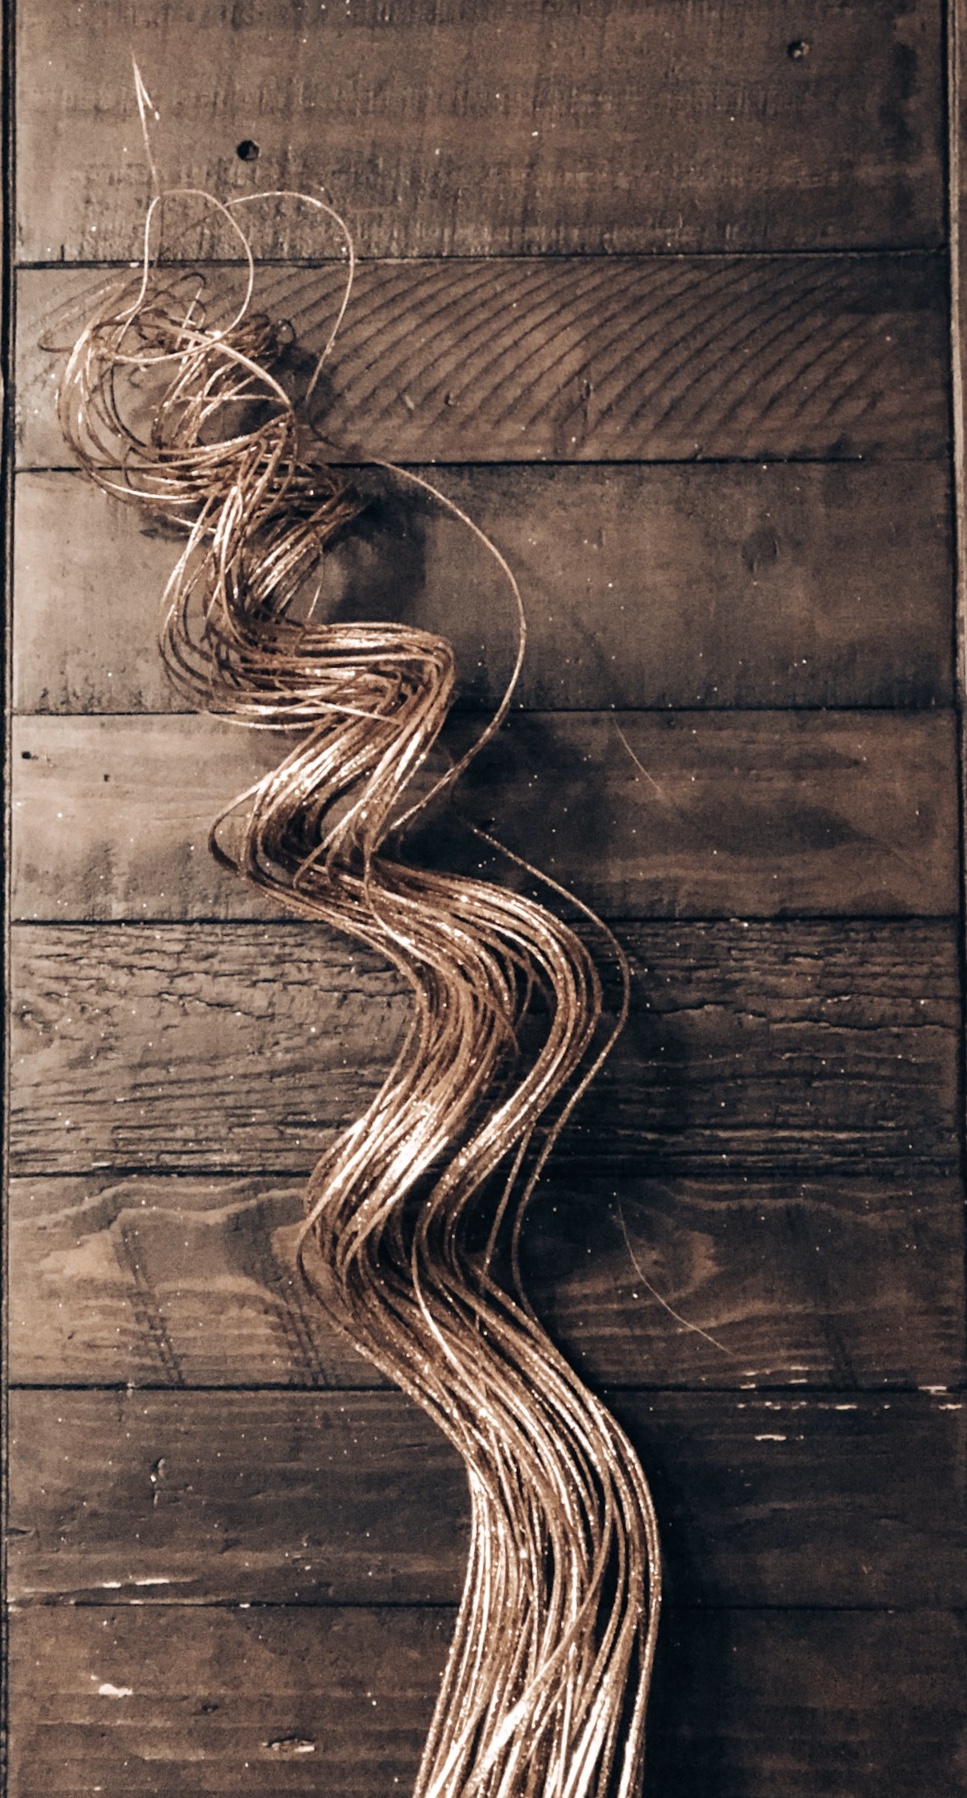
From a few Christmas clearance sales, I was able to get a variety of pine cones, flocked garlands, twinkle lights, and winter floral/greenery. I was also able to use a few of my current Christmas decor items since they are white and not exclusive to Christmas. My winter theme was coming together! The simplicity of the neutral colors with flocked greenery, pine cones to match the wood tones throughout our home, and a touch of light makes our home warm and cozy until the Wisconsin spring weather decides to arrive.

Keep reading to see how each room has been styled for winter!
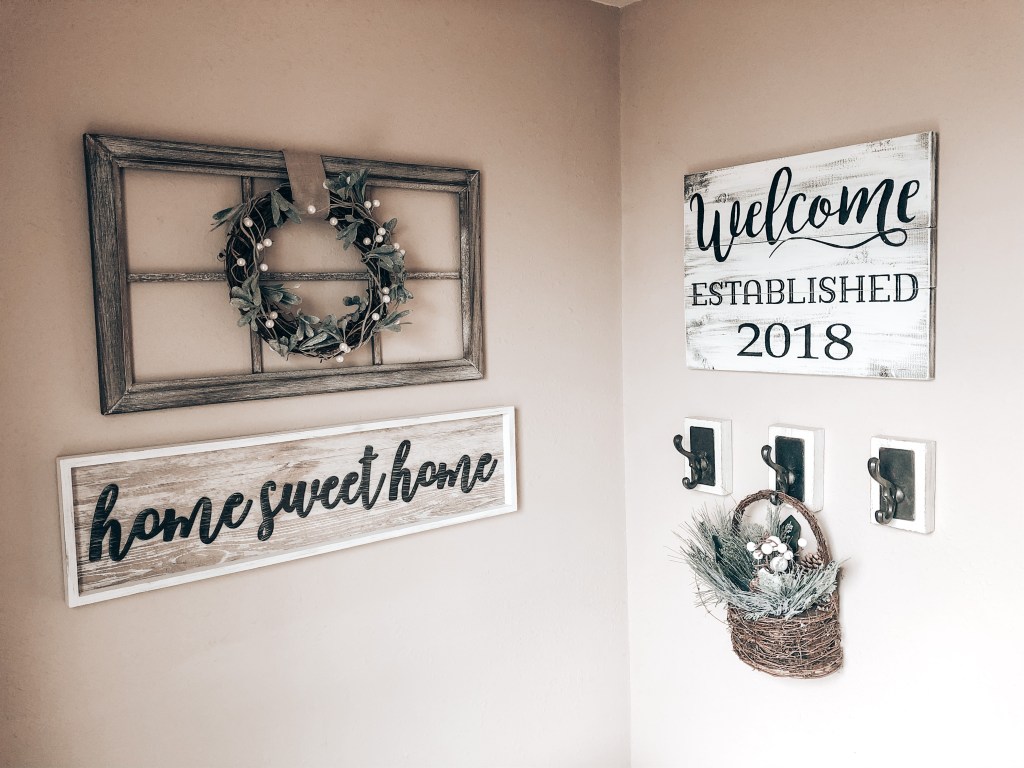
Entryway
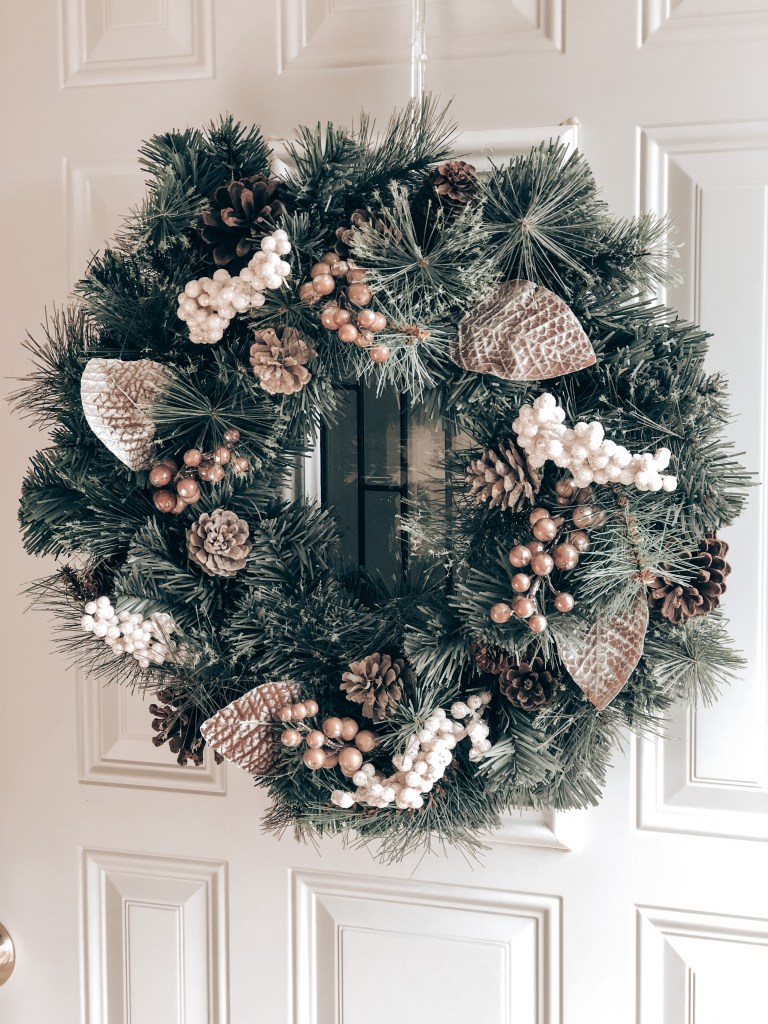
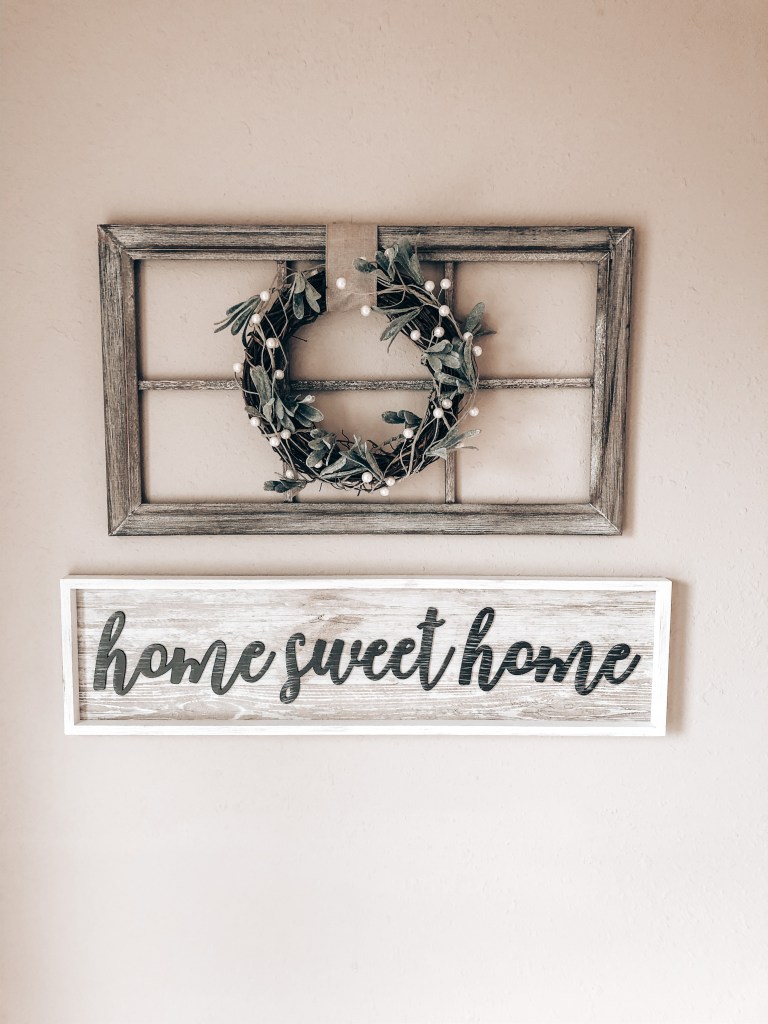
Welcome to our Home Sweet Home! On the front door hangs a wreath that I customized to take it from plain evergreen to neutral winter by using pieces from four floral stems that I took apart and arranged throughout the wreath.

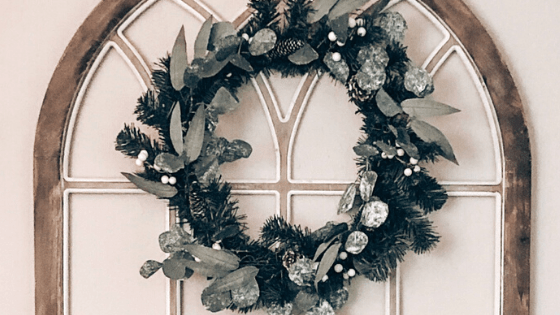
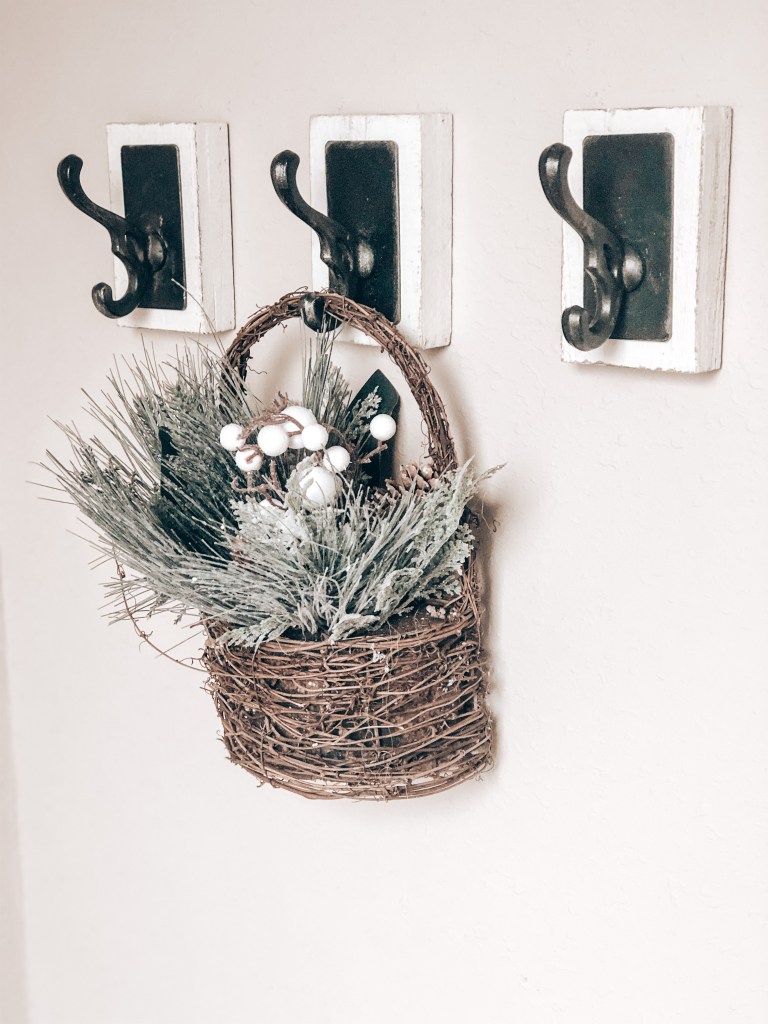
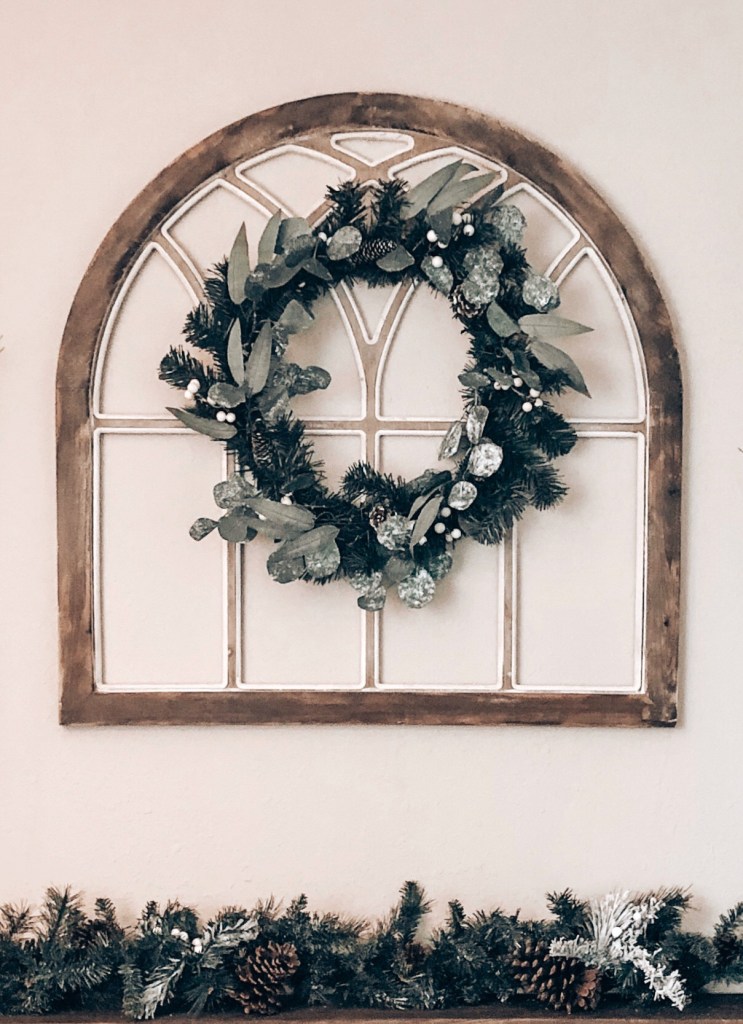
Just inside the front door are hooks for guests to hang their belongings, but I also love to hang seasonal items from them as it adds to space. For winter, I chose to go simple and hung this floral basket from the center hook. On the other wall is a window frame where I hang seasonal wreaths throughout the year. I used a grapevine wreath and paired it with a thin frosted garland.
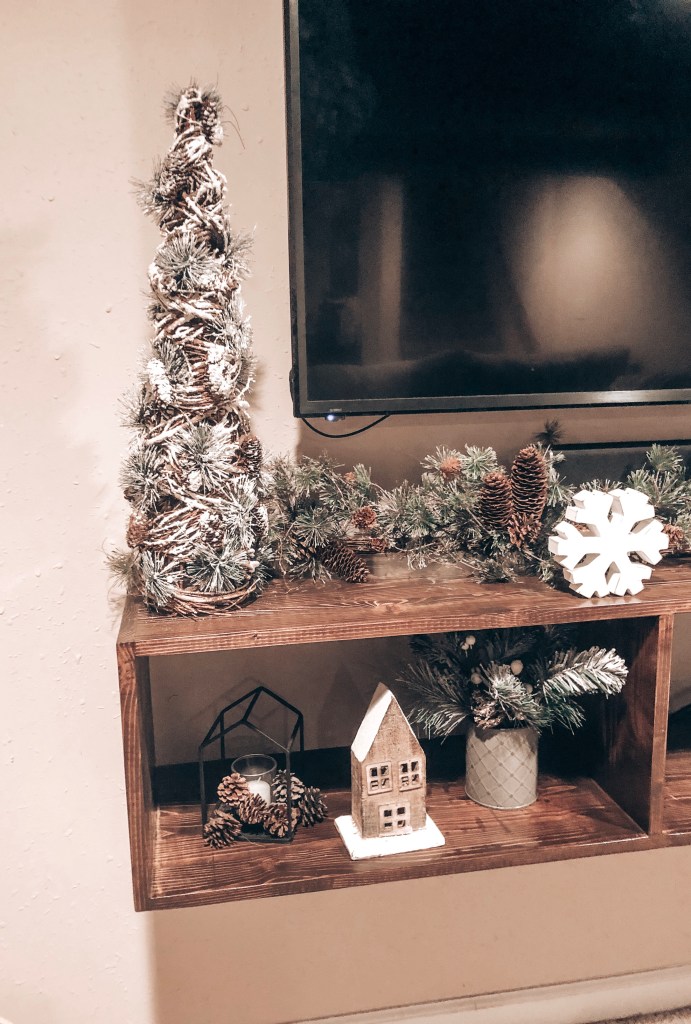
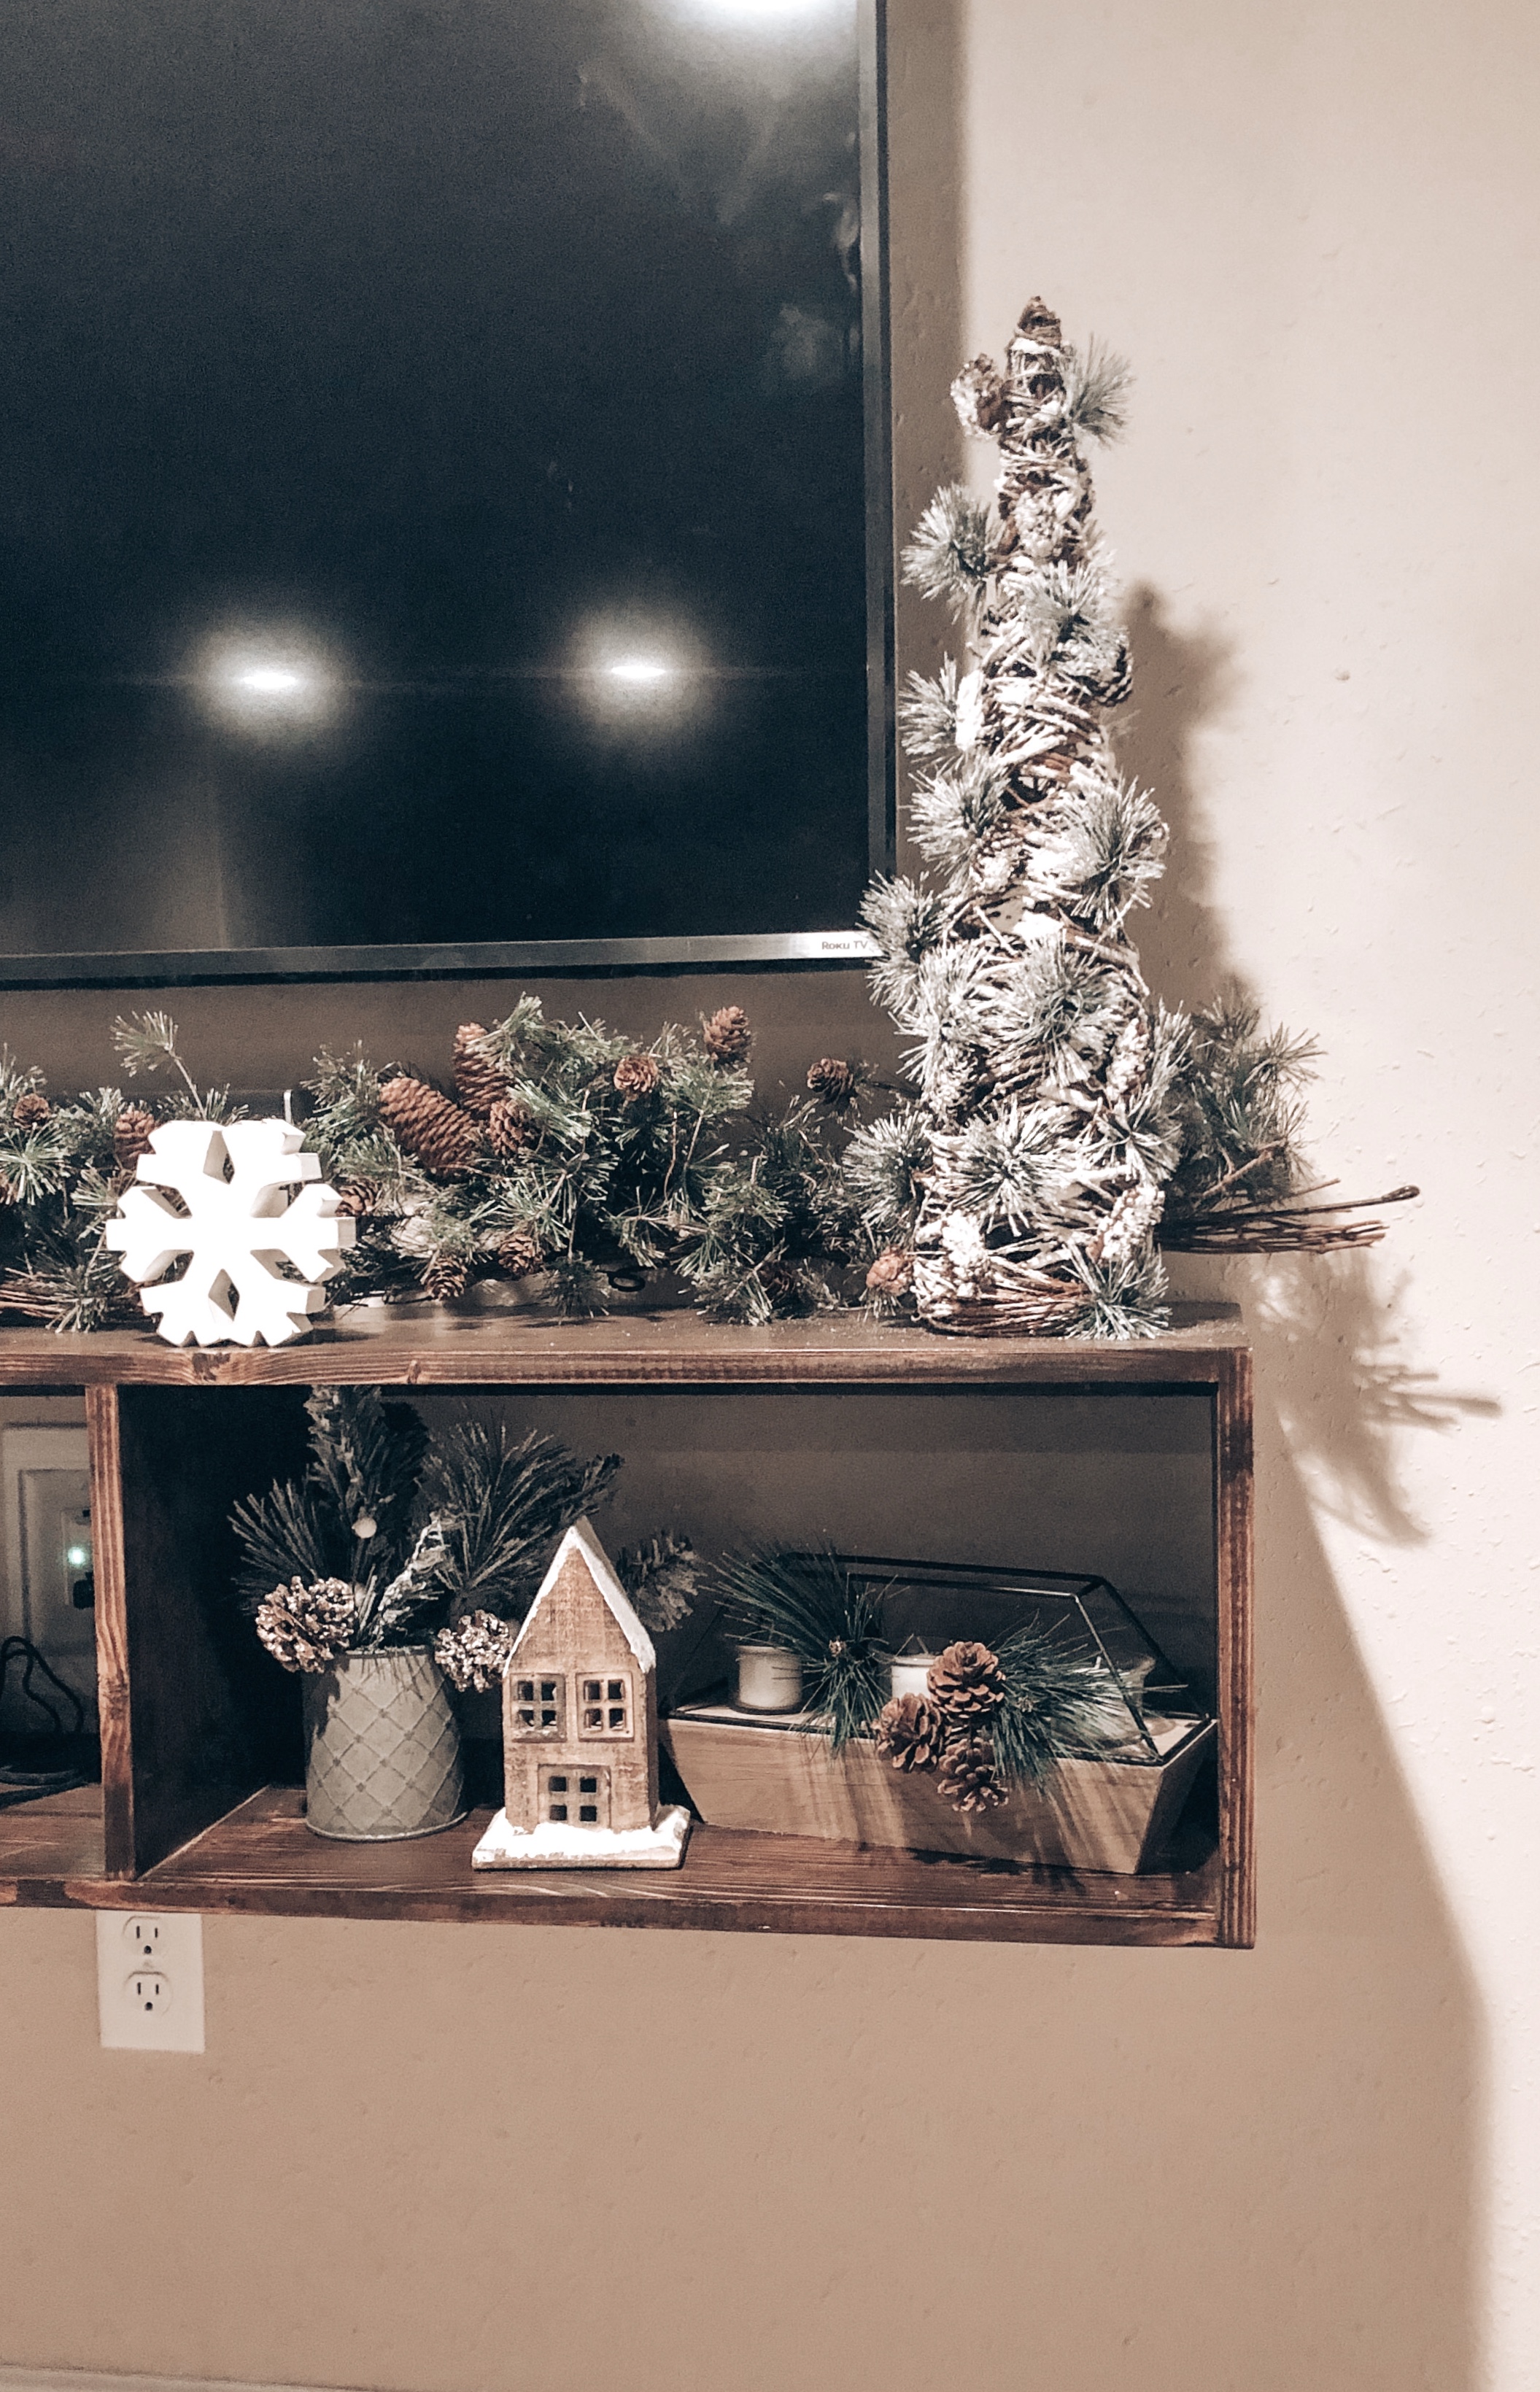
Basement
Our basement floating shelf is one of the main “mantle decor” areas in our home. On top of the shelf lies a garland with pine cones. On each side stands a flocked pine cone tree. From my Christmas decor, I kept the three wooden snowflakes as the focal point of the top shelf. Inside the shelves are two tin vases holding flocked greenery, with evergreen and pine cones surrounding some year-round decor pieces. The middle shelf belongs to my husband, as that is where he keeps his gaming system. For some reason, an Xbox is tricky to incorporate into seasonal decor! 🙂
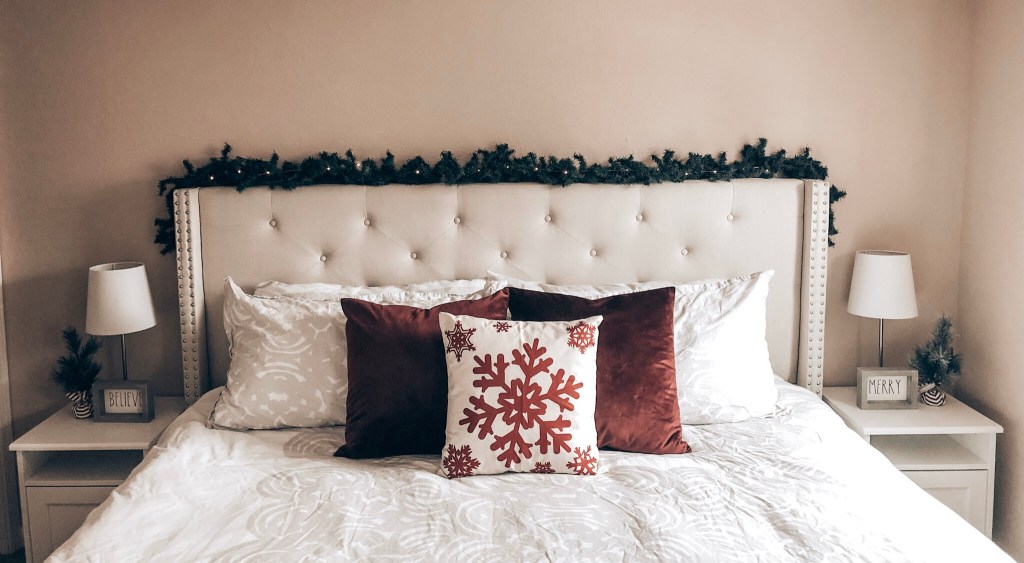
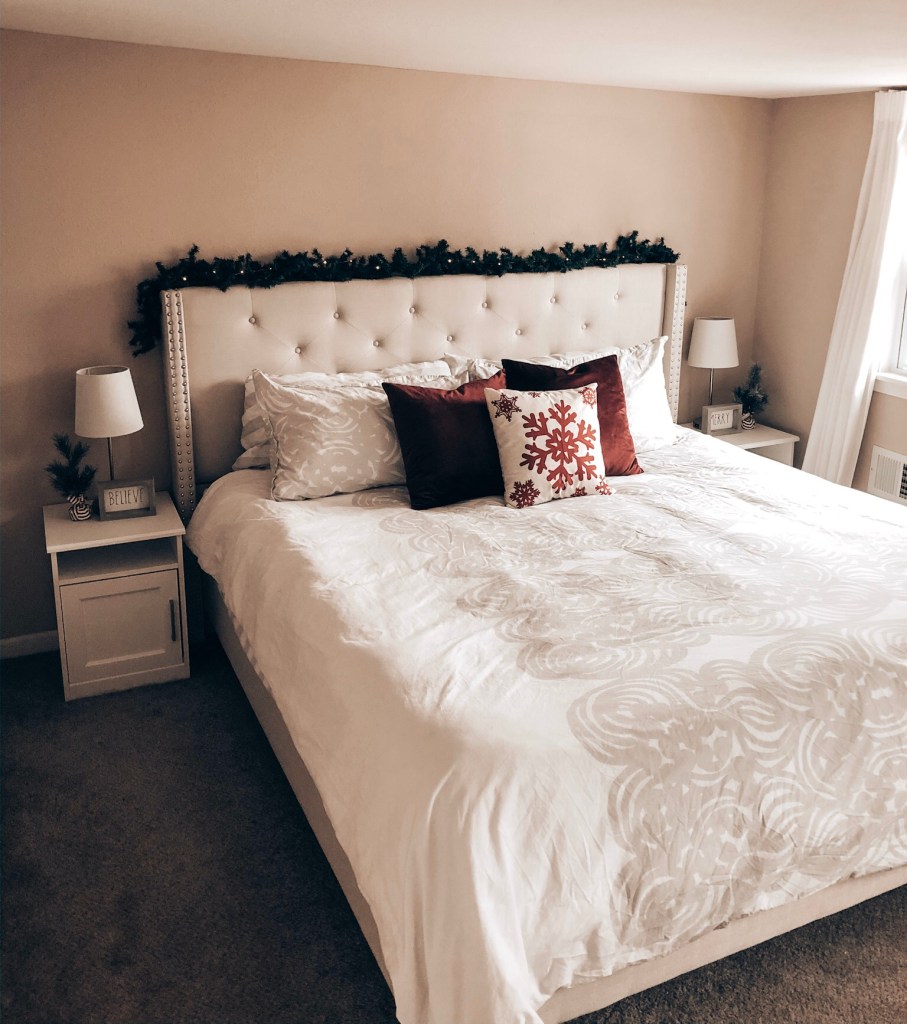
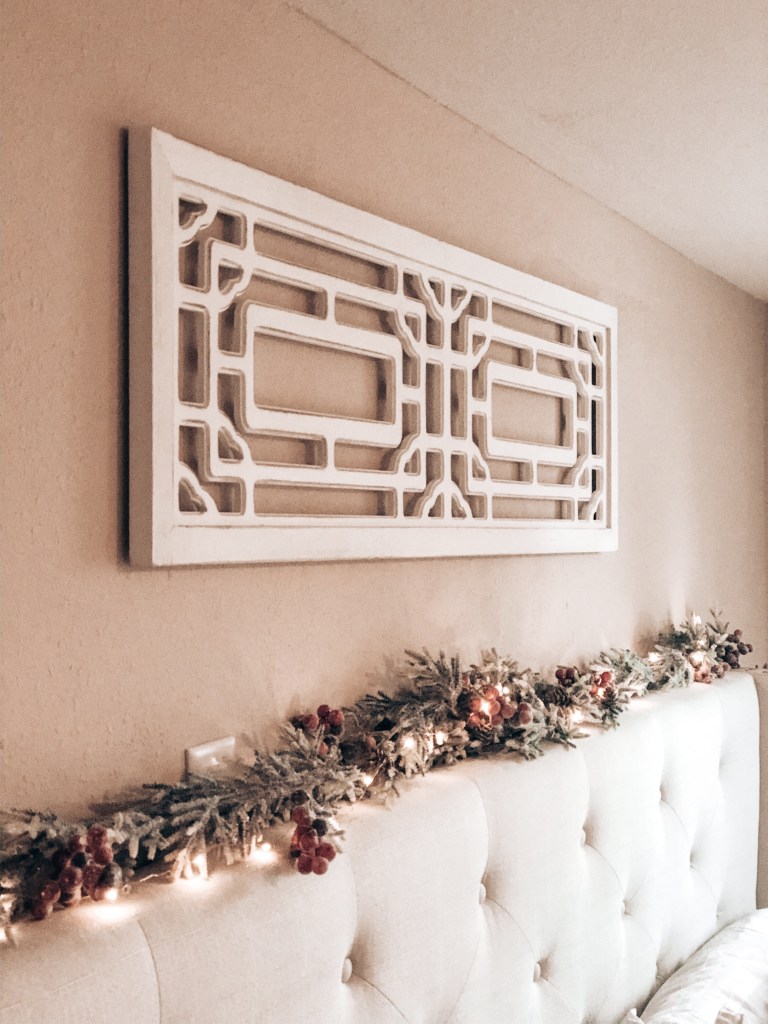
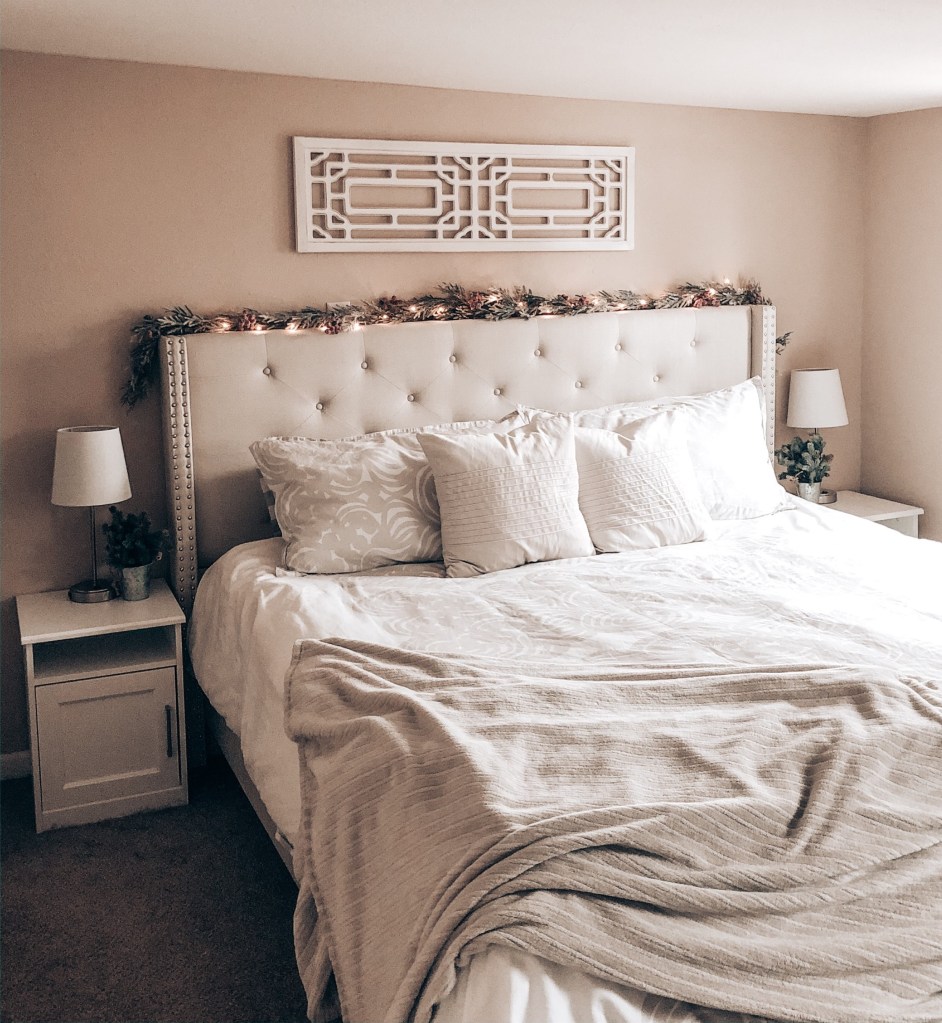
Bedroom
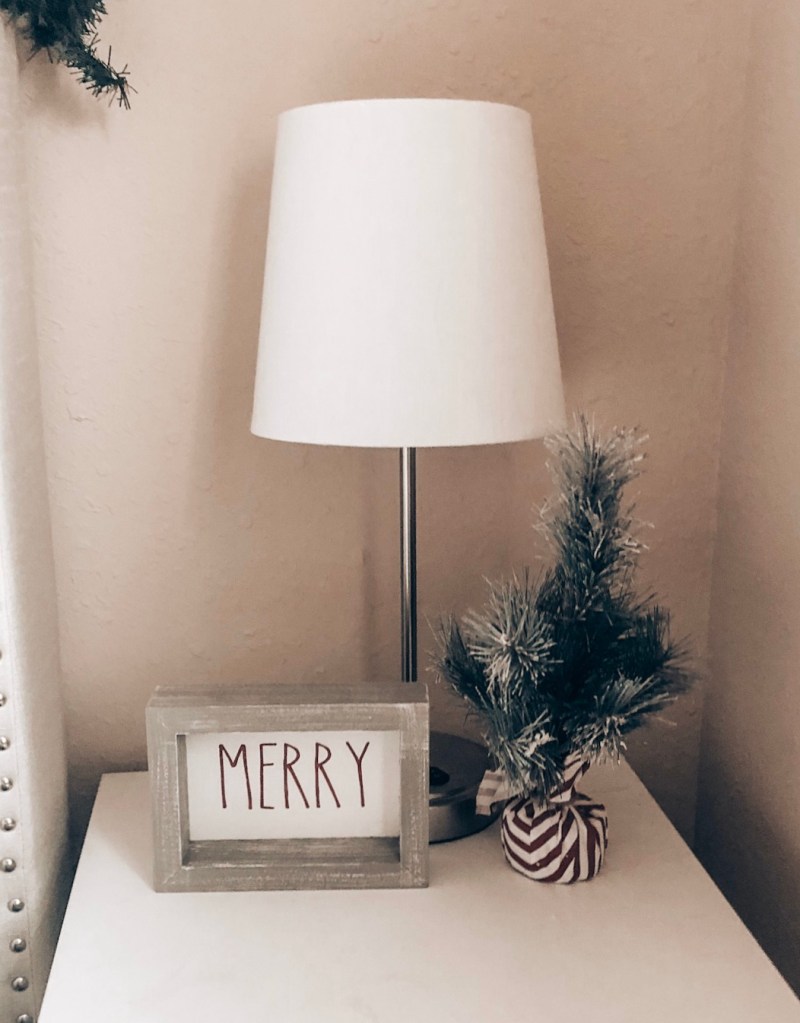
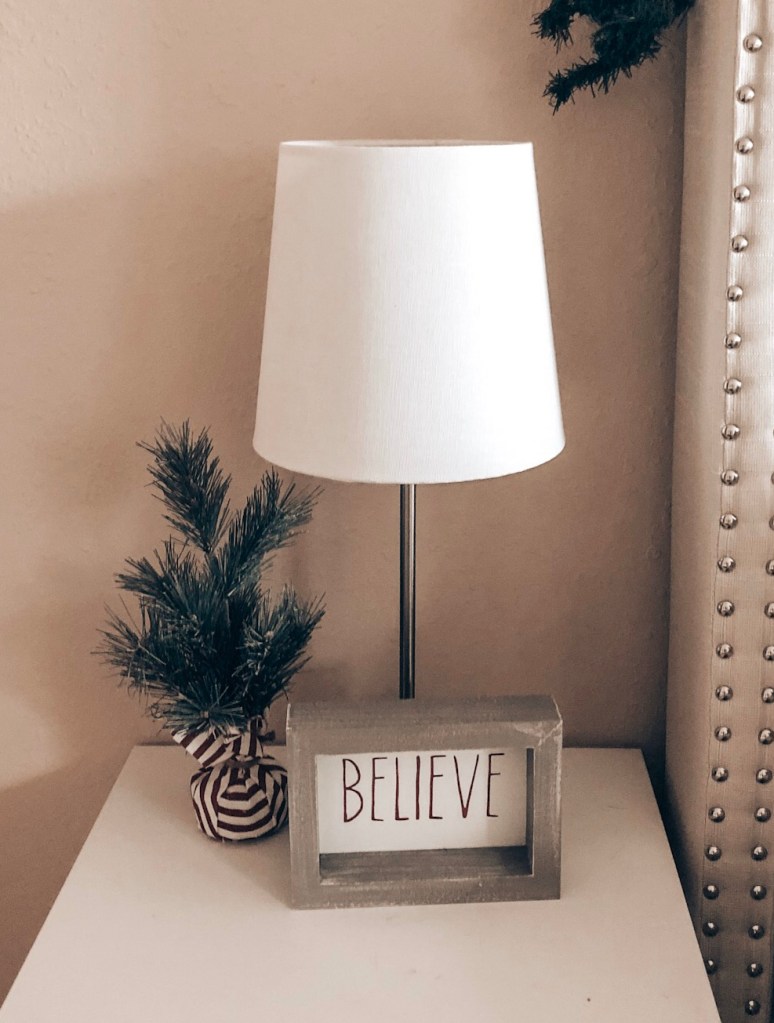
I don’t know about you, but I want my bedroom to be the coziest room in the house! For Christmas, I had an evergreen garland with twinkle lights on top of our headboard. I LOVED having the soft glow of the twinkle lights on at night! I decided to keep the twinkle lights, but switched to a frosted garland with berries. On the night stands, I placed evergreen stems in tin vases beside each lamp.

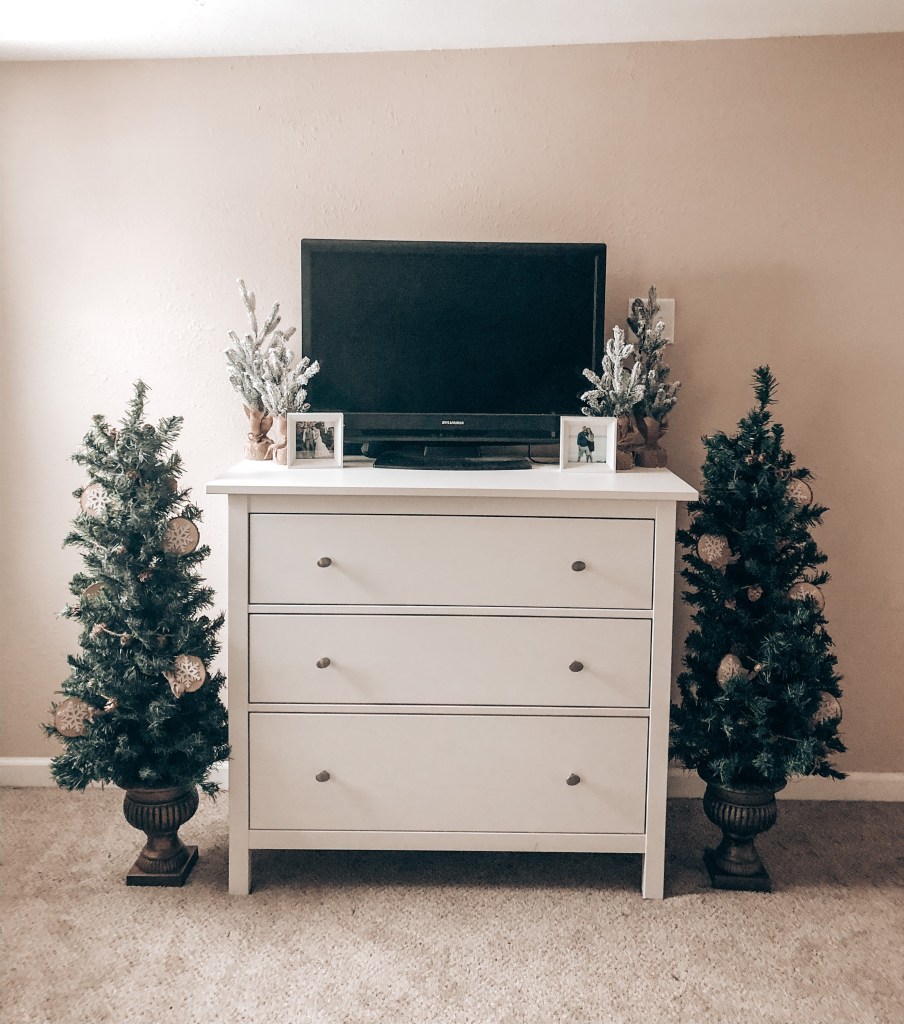
Opposite the bed, I have two small trees on each side of the dresser. I debated putting these away after Christmas, but decided to keep them after removing the red Christmas ribbon. Along with the pine cone lighted garland, I added these wooden snowflake stems to add another touch of winter. On top of the dresser, I have small and large flocked trees to frame the TV. 

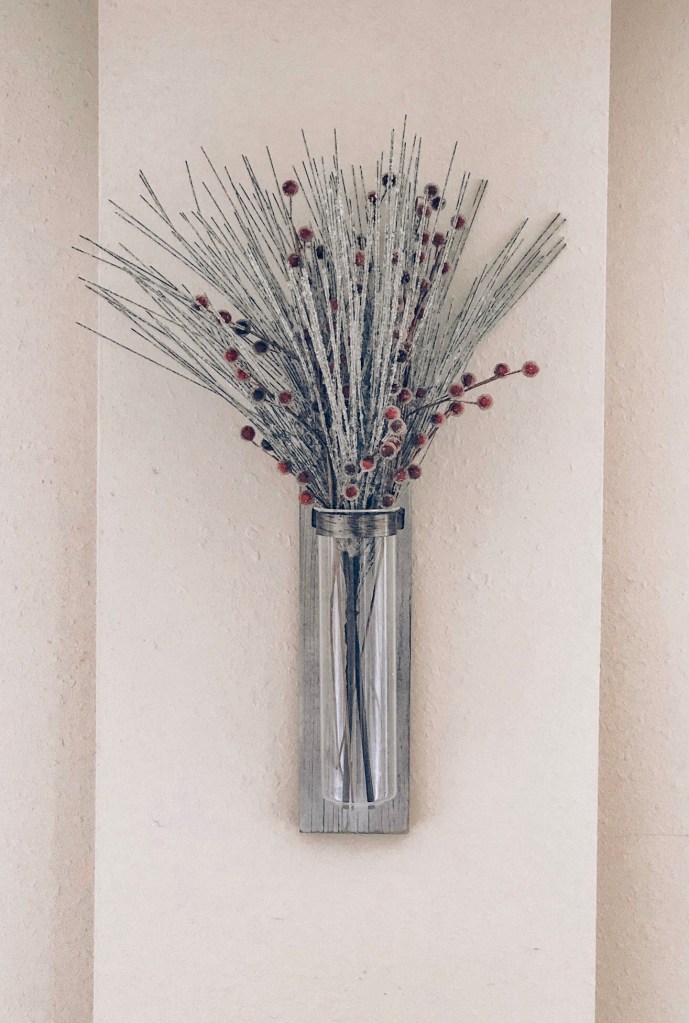
One of my favorite wall decor pieces is this wall sconce that is hung beside our bed. For winter, I added frosted greenery and berries. I just love the simplicity of this!

Living Room
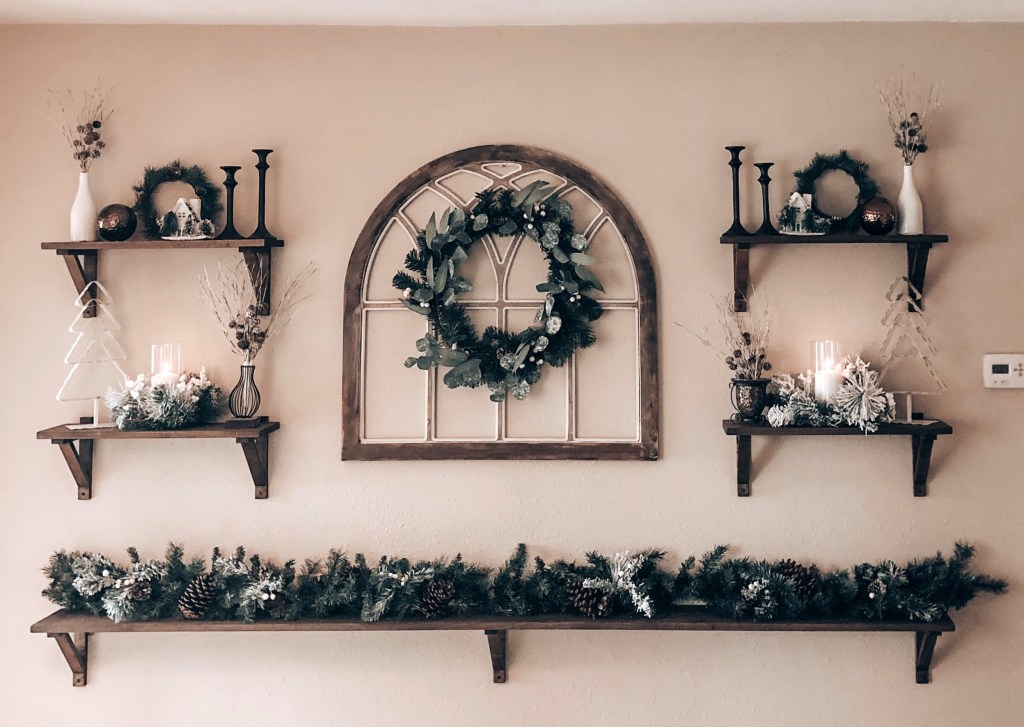
This is my FAVORITE room in the house to decorate! It’s where we spend most of our time and where we have our “feature” wall of shelves.

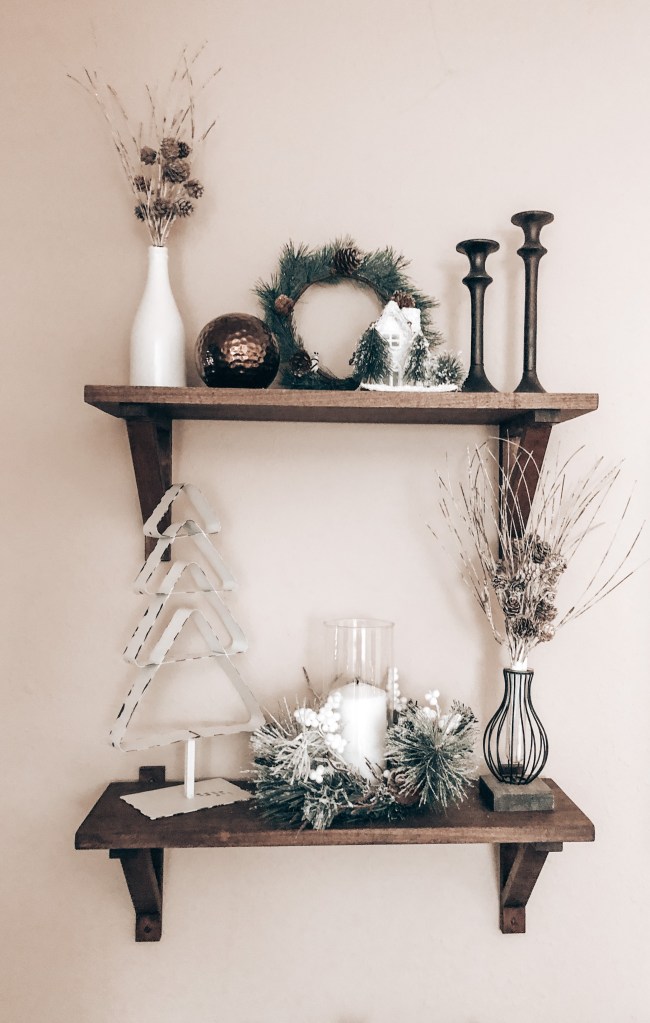
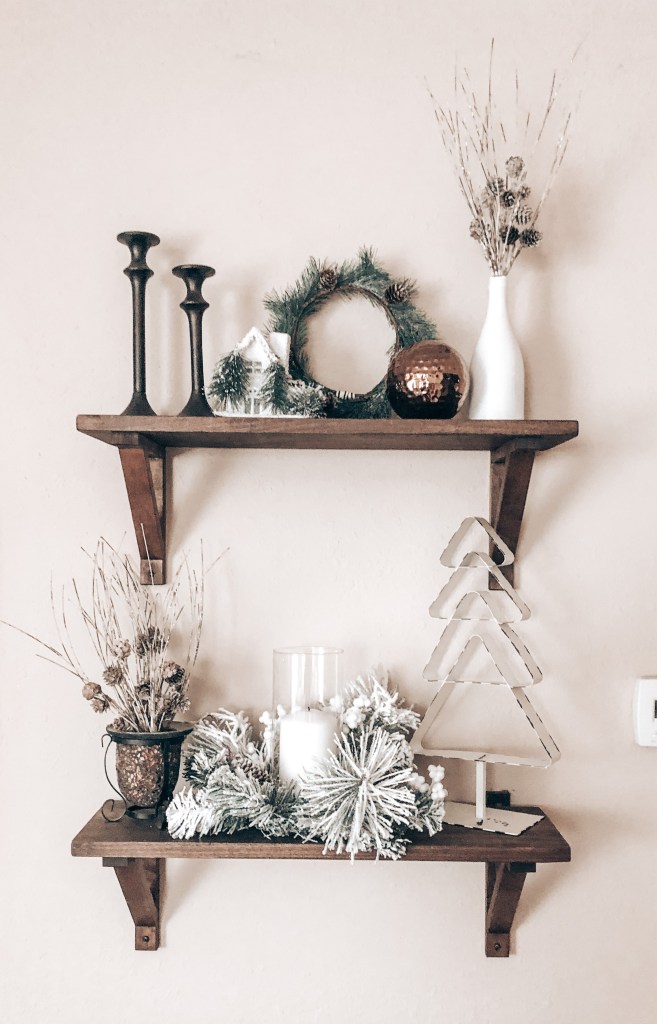
At the center of our shelves is a beautiful window frame with a wreath of flocked greenery and pine cones. The smaller shelves each have a vase of neutral pine cone floral, a small winter house, a small wreath, a white metal tree, and a candle sitting in a flocked wreath. I also used some candlesticks and copper orbs to add to look. The bottom shelf holds a simple garland. To match the garland to the rest of the decor, I added 6 flocked greenery stems, and several large pine cones throughout. I love adding elements to a wreath or garland as it allows you to customize it to the rest of your decor!

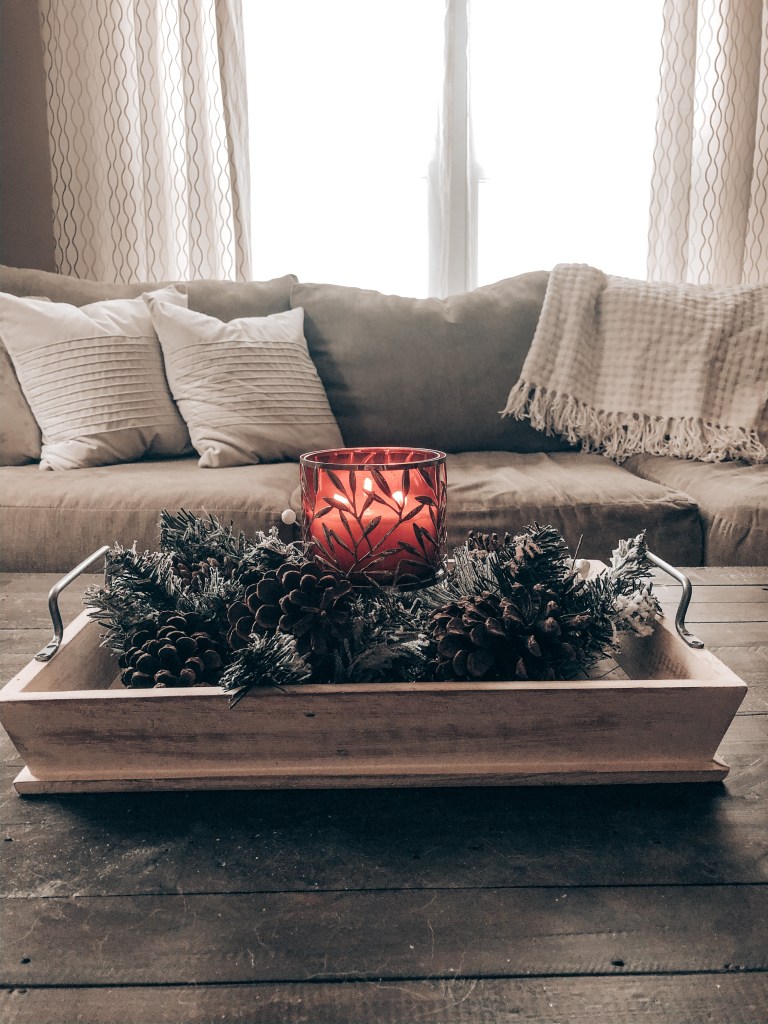
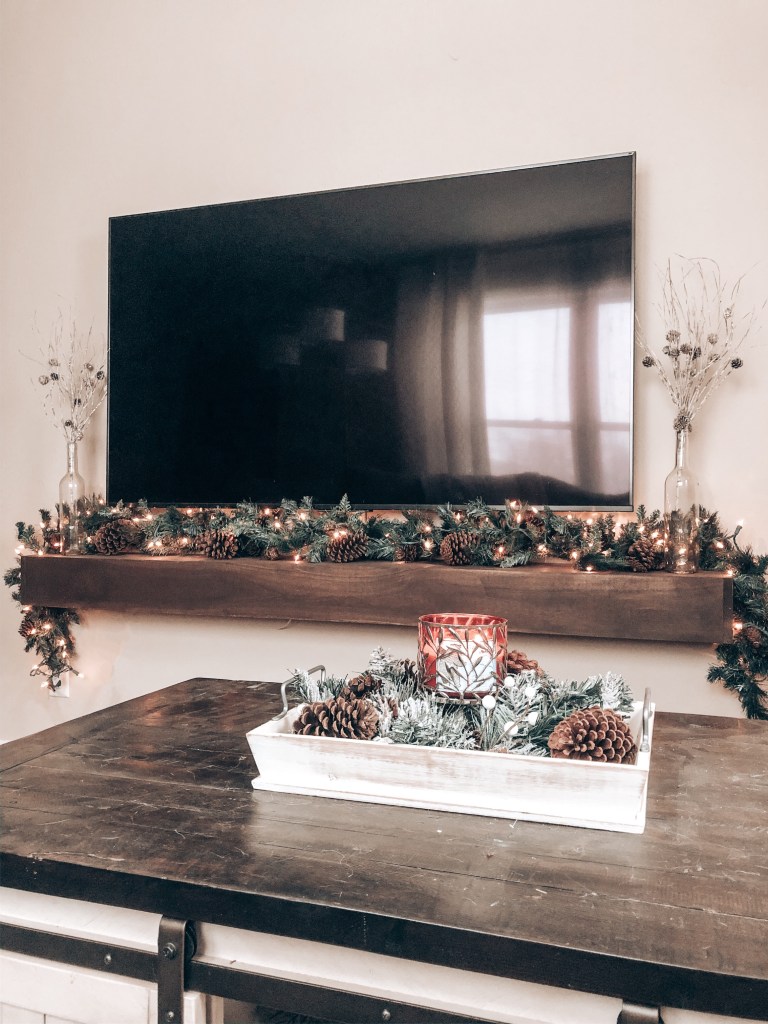
On our coffee table, I use a neutral table tray all year round. Around my bath and body works candle (currently burning Cranberry Woods – I’m obsessed), I use seasonal floral. Of course for winter, I used more flocked greenery and pine cones around the candle stand. 

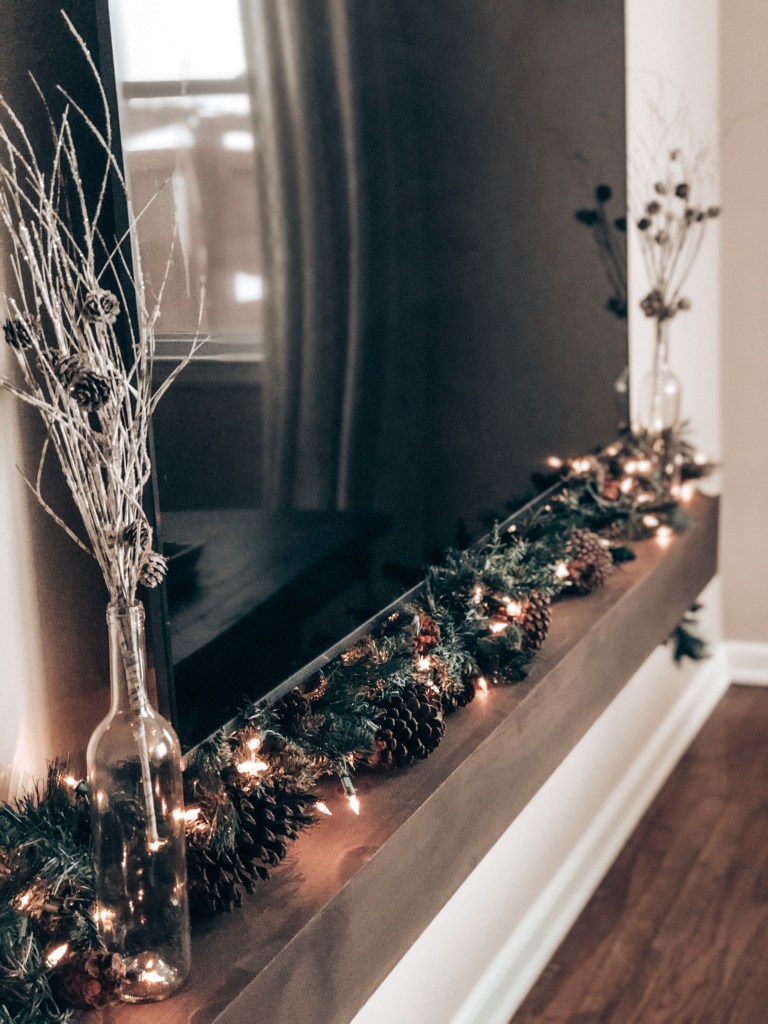
On our TV mantle, I kept the garland that I had up for our Christmas decor. I removed the ornaments, kept the lights (still loving that cozy glow), and added some pine cones. The wine bottle vases hold more of the neutral pine cone floral used on the feature wall.

Kitchen
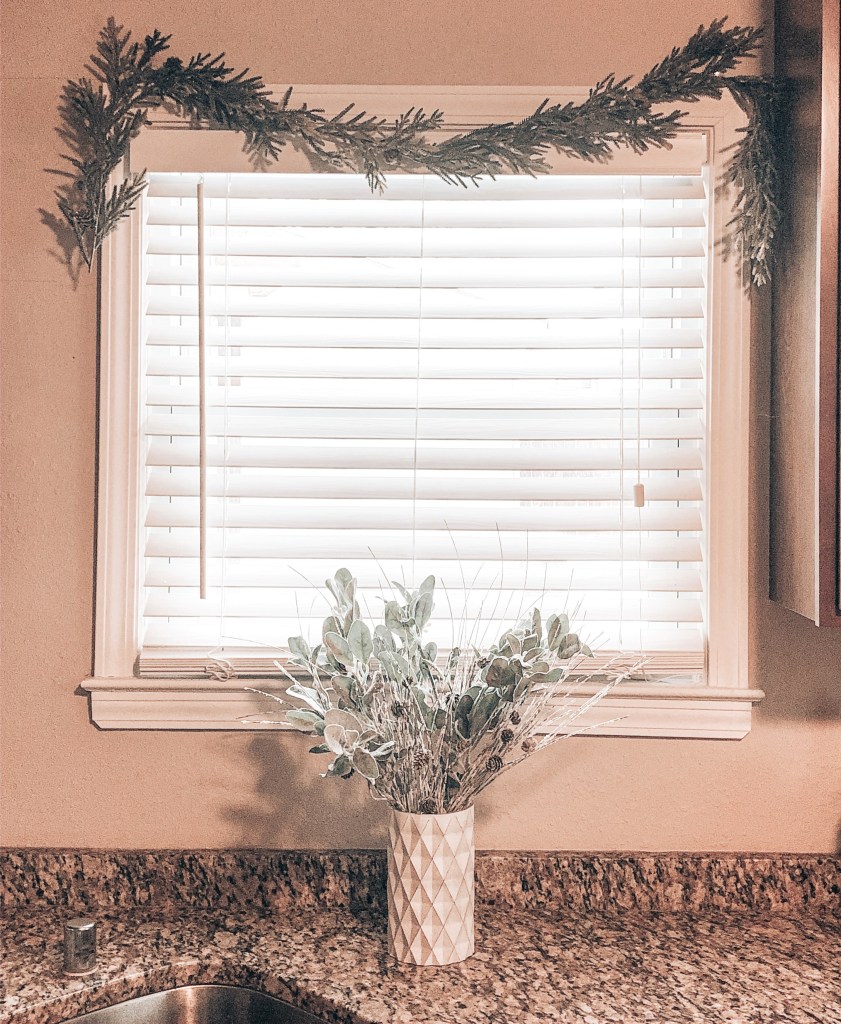
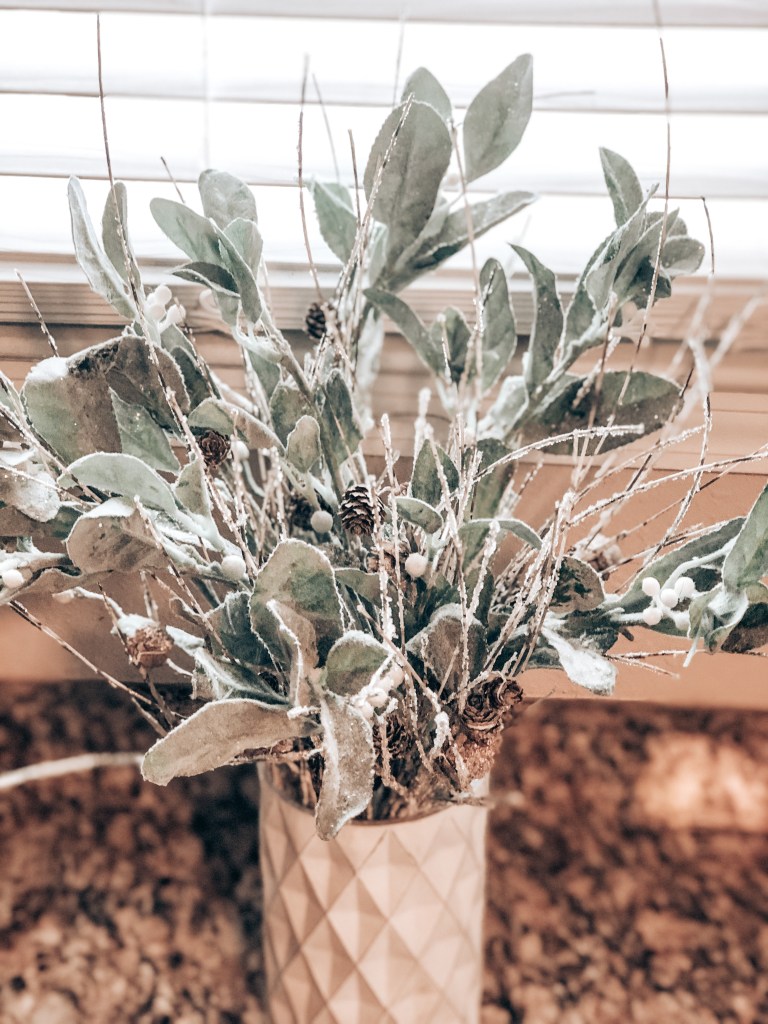
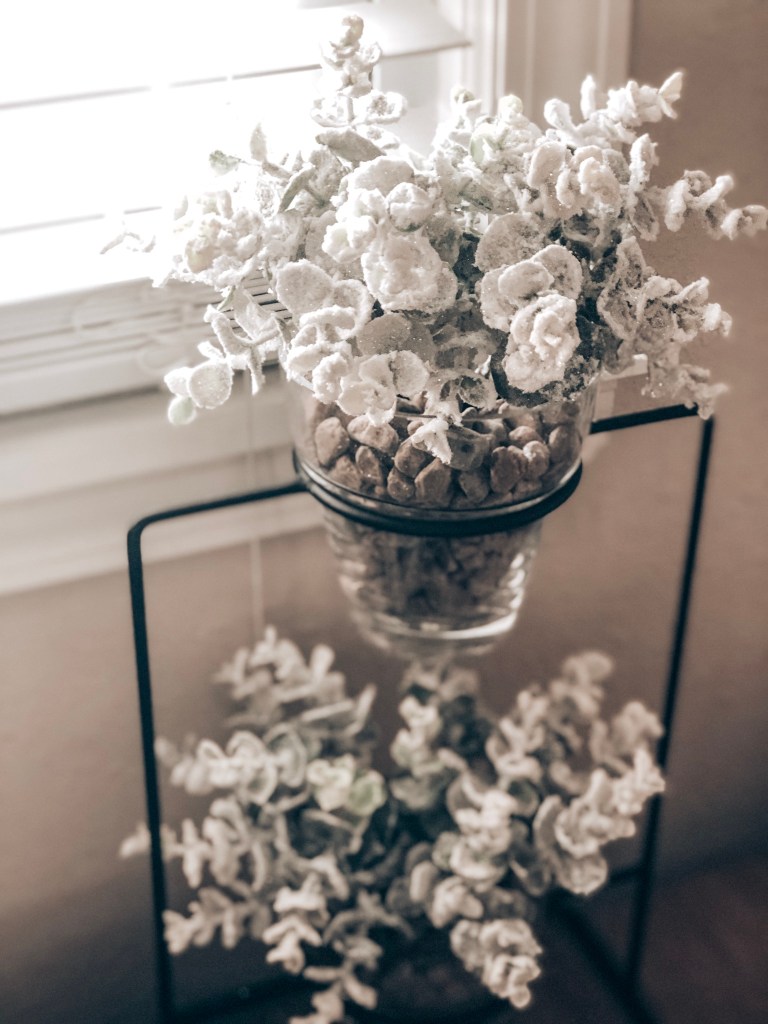
Our kitchen is on the smaller side and it functions as a hub to keep our frequently used personal items, and of course the daily cooking space for my husband. Although there isn’t much room for decor in the kitchen, I try to have a few seasonal elements. Above each window hangs a frosted garland. To match, frosted floral is used in a white vase by the sink and plant stand on the island.


Thank you for touring our home this winter! After we thaw out from this Wisconsin winter, please stop by again to see what our cozy cape cod looks like for spring.

How to Decorate Your Christmas Tree in 5 Easy Steps

It’s here! It’s time to bring out garlands, wreaths, presents, and trees for the most wonderful time of the year!

Setting up and decorating our tree is my absolute favorite part of preparing for the holiday season. My husband loves the classic, fun, look of a tree with colored lights and a mix of ornaments that have been gifted or made over the years. As much as I love a colorful, sentimental tree, the perfectionist in me prefers the look of an elegant, themed tree. 

When planning out our tree while winding up and down the aisles of Hobby Lobby, repeatedly, my ideas were going in all different directions. Do I want to use the classic red and green colors, a blush pink, all silver, all gold? Too many options – which is a good problem to have! I finally decided on burgundy and champagne for the look of our tree. I ended up grabbing two packs of the simple, round ornaments, one in each color.  

Christmas Tree Ornaments

Once our color scheme was set with the ornaments, I began to choose the other decor elements. I typically use ribbon and a few floral stems to give the tree more dimension. I also pick out a few uniquely shaped ornaments that are the same colors as my theme, such as snowflakes or larger, detailed ornaments. After spending way to much time carefully searching and choosing, I purchased glitter champagne wired ribbon, burgundy wired ribbon, burgundy berry stems, gold leafy floral, thin gold spiral stems, large and small snowflake ornaments, icicle ornaments, some glitter ornaments, a tree skirt, and to top it off a glitter star tree topper. Phew – that’s a whole lot of Christmas in way too many Hobby Lobby bags! 

Now let’s decorate our tree!

1. Lights
Once the tree is set up, it’s time to brighten things up with the lights. We love to add twinkling lights to give our living room some extra sparkle. We typically use three strands of twinkling white lights and 4 strands of regular white lights. To turn the tree lights on and off, we use a combination extension cord/foot switch. It allows us to keep the lights plugged in and a quick tap of the foot on the button turns the lights on and off easily.

Christmas Tree Lights

2. Ribbon
Next, I add the ribbon. When putting the ribbon on, I start at the top and wrap it around the tree in a gradual downward fashion. The wire in the ribbon is very helpful to shape the ribbon so it appears flowy as it runs throughout the tree. When using two colors, I always alternate the two going down the tree.

3. Floral
After the ribbon is in place, it’s time for the floral and gold swirls! For this tree’s theme, I have about 20 of the berry stems, 20 of the gold leaf floral, and one package of swirls (contains about 50 stems). I place the elements throughout the tree so each is spread evenly. I have found that the floral with longer stems are easy to place sturdily in the tree. 

4. Ornaments
Now, it’s time for ornaments! I placed them around the tree to have an even mixture of colors, textures, and uniquely-styled ornaments throughout.

5. Topper & Skirt
For the finishing touches, add your tree topper and tree skirt!

And here is the finished product! I love how it turned out!

Christmas Tree
Christmas Tree
Christmas Tree

Everything on my tree is from Hobby Lobby. You can’t beat their prices when all things Christmas are 50% off! Happy decorating! 

Christmas Bedroom Decor

Deck the halls with boughs of holly! Yes, all the halls, including the bedroom! This season was the first time I decorated our bedroom for the holidays, and I am so glad I did! In the past, I’ve kept the bedroom decor more neutral year-round, but this year I couldn’t pass up the opportunity to add more Christmas decor to our home. Having the holiday colors and lights in the bedroom gives it a cozier feel!

Our king headboard is a great staple bedroom piece. It’s a beautiful shade of beige that goes with everything. The tufted headboard also provides the perfect “ledge” to set garland on. In the garland, I wove some string fairy lights to give off a tiny amount of light. The soft glow that the lights create is so pretty that I may never want to take them down!

Headboard/Bed frame
Nightstands
Garland
Lights

I bought two different throw pillow covers to put over plain pillow inserts. The burgundy pillows are 20×20 and the snowflake pillow is 18×18. I prefer to buy pillow covers because they are easier to clean, interchangeable for every season or holiday, and easy to store when not on display. The burgundy covers are SO soft, and the snowflake cover is perfect for the Christmas and winter season!

Snowflake Pillow Cover
Burgundy Pillow Covers
Throw Pillow Inserts

On each nightstand, I have cute little trees that everyone has been loving from the Target Dollar Spot. Cute little Christmas trees for $3 each?! Yes, please! I also found two matching Rae Dunn signs – “Merry” and “Believe” – to sit beside the trees. It’s very simple, but I love how these items match the red from the throw pillows and stand out on the white nightstands. 

Trees
“Believe” Wood Sign
“Merry” Wood Sign

Who else decorates their bedrooms for the holidays or seasons? Describe your favorite bedroom decor in the comments below! 

Creating A Fall Tablescape

Although you will find a few garlands, a Christmas tree, and us rocking out to the occasional Christmas song, I will be bringing back the fall colors for our Friendsgiving and Thanksgiving gatherings at our house in the next week. Pumpkins and garland go together right?!

Since being in our home for only a year, we haven’t really had the opportunity to host a formal gathering. So I am excited for us to host and to put together a formal tablescape!

While planning for the table settings and centerpiece, I knew I wanted to keep the overall look of the table neutral, as shades of white and beige pair so well with the warm Thanksgiving and fall colors. And, who doesn’t love neutrals! I actually styled all of the table decor around the placemats. They were the first item that I purchased when the Hobby Lobby fall decor hit the shelves. I loved the simple, fall look of them!

Next, I found my table runner at Home Goods. They had so many different colors with added festive details that would be perfect for Thanksgiving or Christmas, but I opted for a neutral color so I could incorporate it into other seasonal tablescapes throughout the year.

I also chose to incorporate a set of striped napkins, navy and beige. To add some color to the place settings, I found these cute orange pumpkins at Hobby Lobby to set atop each napkin. 

Last to my tablescape were the plates. I did buy new plates given that we were hosting a formal meal for the first time in our house. Our previous ones were purple. Yes, purple plates. I bought them when I was living in the city as a single gal. So, the time came for hosting, and I figured that it was the time to upgrade. These white plates are from Ikea; I’m all about finding affordable items, and these plates are great quality! 

As for the centerpiece, I used white pumpkins, all from this year’s fall decor at Hobby Lobby. You can never have too many pumpkins! I styled them among two fall candles and some floral to bring in another subtle touch of color.

And voila! We have a completed tablescape perfect for a fall gathering of friends and family. I love the way the colors work together while keeping an overall neutral feel. Now all that’s missing is the food! 

Happy dining everyone!

10 Must Have Beauty Products


As a lover of all things beauty, I have found myself shopping at Sephora and Ulta too many times to count. I’ve also subscribed to a few monthly makeup boxes that have allowed me to try out new items and brands that I wouldn’t necessarily have bought on my own. Yes, I may have a makeup addiction – sorry, not sorry! I’ve gotten to play with SO many items and brands over the years, and I find myself coming back to a few items over and over again! I’ve recently stocked up on my favorite beauty items. I come back to these products again and again because they deliver with every single use!

Here are my Top 10 beauty must haves!

  1. Hourglass Veil Mineral Primer – $54.00

Oily skin – yes, that’s me! I’ve tried numerous primers, each with powder foundations, liquid foundations, BB and CC creams, setting powders, oil blotting sheets, makeup re-application – anything I could do to help my makeup stay on and keep the shininess at bay. This has basically been a life struggle for me since high school! About two years ago I decided to splurge on Hourglass’ Veil Mineral Primer after reading many positive reviews. I AM SO GLAD I DID! After using only the tiniest drop (a little goes a long way), your skin feels like silk, and any foundation goes on smooth and blends effortlessly. Second, and most importantly, my face stays matte and my foundation doesn’t budge. Holy grail product here, friends! I have used this with other liquid foundations, powders, or CC creams and no matter what the product, the foundation stays on and my skin stays matte for 8+ hours!

  1. Lancome CILS Booster XL Super-enhancing Mascara Base – $26.00

This is a MUST to pair with any mascara for longer, thicker lashes. My lashes are short and need any help they can get! This is by far the best mascara primer out there. Simply apply a coat of this just as you would mascara, then apply your mascara, and Ta-Dah – longer lashes!

  1. Too Faced Better Than Sex Mascara – $25.00

Like I mentioned, my lashes are short unfortunately most mascaras don’t lengthen them and the product goes on very clumpy. Not this one! I have gone through countless tubes of this stuff. The wand is shaped effectively to coat every lash and the formula is so smooth! This also pairs fantastically with the Lancome CILS Booster XL Mascara Base (see #2).

  1. Too Faced Shadow Insurance – $22.00

Just as our face needs primer for foundation, our eyelids need a primer for eyeshadow! Eye shadow primers make colors look more vibrant and most importantly prevent our shadows from creasing. Creasing was my main problem for a while. I have tried the other cult-favorite eyeshadow primer, Urban Decay’s Eyeshadow Primer Potion, but I have found TooFaced’s to be more effective in making your eye makeup last.

  1. Too Faced Peach Perfect Mattifying Setting Powder – Peaches and Cream Collection – $33.00

This is another great product to help foundation last all day long. As I’m nearing 30 I’ve also learned that this setting powder is very helpful to prevent foundation/concealer from creasing in those fine lines and wrinkles! Of all the setting powders I’ve tried, this is my favorite because the powder is extremely fine, it makes your skin feel very smooth after application, and it doesn’t make your makeup cakey after wear. It also doesn’t create any flashback from flash photography. As an added bonus, it smells delicious! 

  1. OLEHENRIKSON 3 Little Wonders (Truth Serum; Sheer Transformation Perfecting Moisturizer; Invigorating Night Transformation Gel) – $72.00

OLEHENRIKSON is hands down my favorite skin care line! This awesome kit gives you mini versions of their morning serum, night serum, and moisturizer. The continued use of these three products targets signs of aging, evens out skin tone, firms, and hydrates skin. After I started using these products, there was a noticeable difference in how my face looked and felt. My makeup went on smoother and my skin had a glow to it which helped me feel more confident on days when I didn’t wear any foundation. Since this product changed my skin for the better, I began using some of the other products from OLEHENRIKSON and also fell in love, which leads me to my #7 and #8 picks.

  1. OLEHENRIKSON Find Your Balance Oil Control Cleanser – $26.00

This cleanser is part of this brand’s Find Your Balance line made for oily skin. While it does help with oil, I also have seen an amazing reduction in breakouts since starting to use this cleanser. It’s gentle on your skin, but it gives big results!

  1. OLEHENRIKSON Transforming Walnut Scrub – $28.00

Your face has not been truly clean if you have not tried this walnut scrub – holy exfoliation! The product says to only use a few times a week, but I use it daily after I use the Oil Control cleanser to exfoliate and clear out pores. Other face scrubs that I have used seem to have less exfoliation power, and doesn’t really remove all your makeup and dead skin cells. After one use of this, your face will feel refreshed, smooth, and oh so clean!

  1. IGK First Class Charcoal Detox Dry Shampoo – $27.00

When your hair needs a quick pick me up, this is a fantastic go to. It gives great volume and texture for a dry shampoo. I also like that it doesn’t smell like a typical dry shampoo. I don’t know about you, but the usual dry shampoo smell is strong and makes me feel a bit unclean. This one absorbs any oil quick, and gives hair a beautifully clean look.

  1. Moroccanoil Dry Texture Spray – $28.00

My hair is thick and smooth, so it has minimal texture and gets weighted down very quickly. I often curl my hair each day, and it looks great…for about 30 minutes, and then hello flat hair. I had been determined to find a spray or mousse to give my hair some life that would STAY throughout the day. This texture spray had been what I was looking for! It gives lots of texture and body without being heavy or cakey in your hair. And it smells good too!